Zookeeper 实现配置中心
1. 前言
在分布式的应用中,存在大量独立部署的服务,有些服务还可能是集群部署的,如果有些服务的配置项发生变化,那么我们可能就要修改许多服务的配置,并且重新部署服务,这会是一件工作量极大的而且容易出错的事情,而且在重新部署的过程中,依赖这个服务的其它服务就会变得不可用,有可能导致应用发生雪崩。
那么我们该如何解决这个问题呢?我们可以使用的解决方案之一就是使用 Zookeeper 来管理服务的配置,在我们使用配置中心更新配置后,服务动态的感知配置的变化,自动更新配置,而且服务不需要重新部署。接下来我们就来学习如何使用 Zookeeper 来实现配置中心。
2. Zookeeper 实现配置中心
配置中心来更新配置的方式有两种,一种是由配置中心的配置更新后向服务推送更新的配置,另一种是服务定时轮询的方式的去配置中心拉取配置,发现配置中心的配置被更新就更新自己的配置。
Zookeeper 实现配置中心的方式:服务把自己的配置信息存储到 Zookeeper 节点的 data 上,并且对这个节点开启 Watch 监听,只要这个节点的数据发生变化,Zookeeper 就会把这个消息推送给服务,服务在回调事件中去获取该节点的数据,然后使用新的数据更新自己的配置。那么根据这个思路,我们就开始使用 Zookeeper 来实现配置中心。
这里我们使用 Zookeeper 来维护数据源的信息,使用 Spring Boot 框架来搭建测试项目。
2.1 基础项目构建
我们使用 IDEA 来构建项目,选择 Spring Initializr 来初始化 Spring Boot 项目。
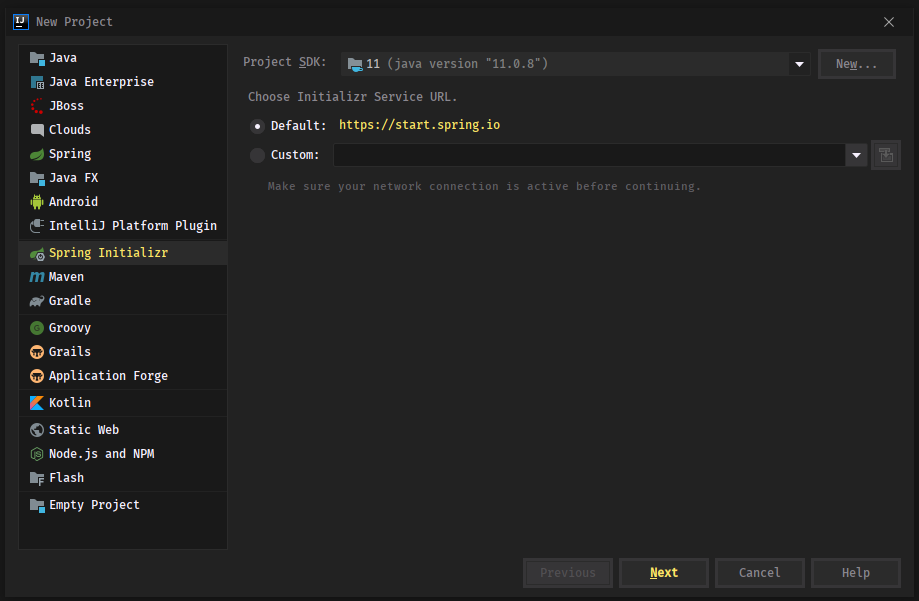
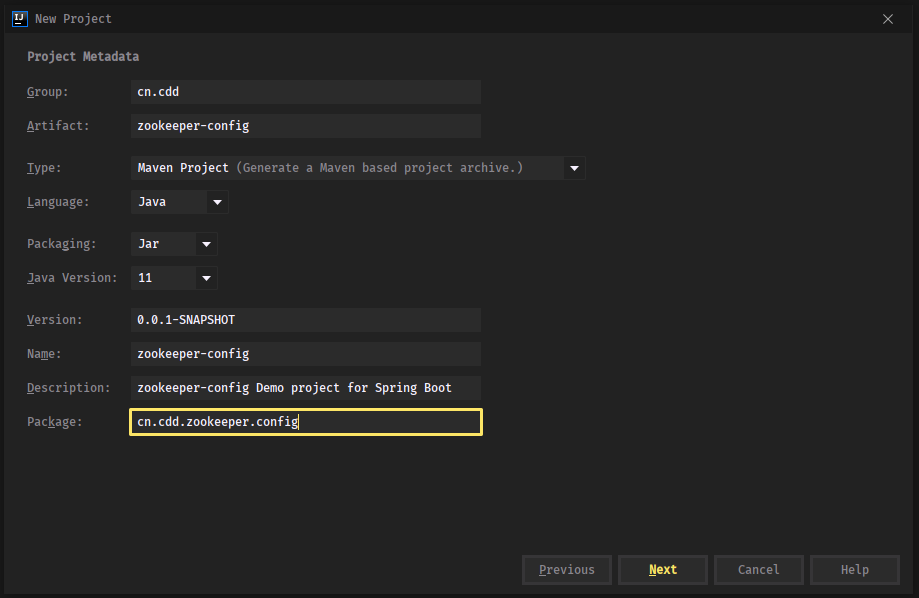
这是我们的项目信息:
- pom.xml
初始化完成后,在 pom.xml 文件中加入我们需要的依赖:
<?xml version="1.0" encoding="UTF-8"?>
<project xmlns="http://maven.apache.org/POM/4.0.0" xmlns:xsi="http://www.w3.org/2001/XMLSchema-instance"
 xsi:schemaLocation="http://maven.apache.org/POM/4.0.0 https://maven.apache.org/xsd/maven-4.0.0.xsd">
    <modelVersion>4.0.0</modelVersion>
    <parent>
        <groupId>org.springframework.boot</groupId>
        <artifactId>spring-boot-starter-parent</artifactId>
        <version>2.3.4.RELEASE</version>
        <relativePath/> <!-- lookup parent from repository -->
    </parent>
    <groupId>cn.cdd</groupId>
    <artifactId>zookeeper-config</artifactId>
    <version>0.0.1-SNAPSHOT</version>
    <name>zookeeper-config</name>
    <description>zookeeper-config Demo project for Spring Boot</description>

    <properties>
        <java.version>11</java.version>
    </properties>

    <dependencies>
        <!-- Web 依赖 -->
        <dependency>
            <groupId>org.springframework.boot</groupId>
            <artifactId>spring-boot-starter-web</artifactId>
        </dependency>
        <!-- 持久层框架 -->
        <dependency>
            <groupId>org.mybatis.spring.boot</groupId>
            <artifactId>mybatis-spring-boot-starter</artifactId>
            <version>2.1.3</version>
        </dependency>
        <!-- curator 客户端 -->
        <dependency>
            <groupId>org.apache.curator</groupId>
            <artifactId>curator-framework</artifactId>
            <version>5.1.0</version>
        </dependency>
        <!-- curator 客户端 -->
        <dependency>
            <groupId>org.apache.curator</groupId>
            <artifactId>curator-recipes</artifactId>
            <version>5.1.0</version>
        </dependency>
        <!-- druid 连接池 -->
        <dependency>
            <groupId>com.alibaba</groupId>
            <artifactId>druid-spring-boot-starter</artifactId>
            <version>1.1.22</version>
        </dependency>
        <!-- mysql 数据库 -->
        <dependency>
            <groupId>mysql</groupId>
            <artifactId>mysql-connector-java</artifactId>
            <version>8.0.19</version>
        </dependency>
        <!-- fast json -->
        <dependency>
            <groupId>com.alibaba</groupId>
            <artifactId>fastjson</artifactId>
            <version>1.2.73</version>
        </dependency>

        <dependency>
            <groupId>org.springframework.boot</groupId>
            <artifactId>spring-boot-devtools</artifactId>
            <scope>runtime</scope>
            <optional>true</optional>
        </dependency>

        <dependency>
            <groupId>org.springframework.boot</groupId>
            <artifactId>spring-boot-starter-test</artifactId>
            <scope>test</scope>
            <exclusions>
                <exclusion>
                    <groupId>org.junit.vintage</groupId>
                    <artifactId>junit-vintage-engine</artifactId>
                </exclusion>
            </exclusions>
        </dependency>
    </dependencies>

    <build>
        <plugins>
            <plugin>
                <groupId>org.springframework.boot</groupId>
                <artifactId>spring-boot-maven-plugin</artifactId>
            </plugin>
        </plugins>
    </build>

</project>
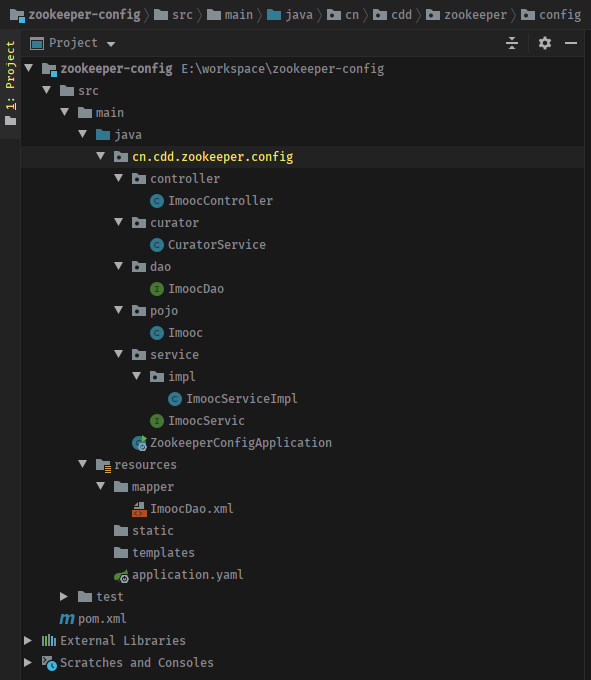
- 目录结构
依赖导入完毕后,我们开始编写代码,下图为本项目的目录结构:
- 实体类 Imooc
首先我在 pojo 目录下创建我们的 Java 实体类 Imooc:
package cn.cdd.zookeeper.config.pojo;

import java.io.Serializable;

public class Imooc implements Serializable {

    private Integer id;
    private String username;
    private String password;
    private String phone;
    private String address;

    public Integer getId() {
        return id;
    }

    public void setId(Integer id) {
        this.id = id;
    }

    public String getUsername() {
        return username;
    }

    public void setUsername(String username) {
        this.username = username;
    }

    public String getPassword() {
        return password;
    }

    public void setPassword(String password) {
        this.password = password;
    }

    public String getPhone() {
        return phone;
    }

    public void setPhone(String phone) {
        this.phone = phone;
    }

    public String getAddress() {
        return address;
    }

    public void setAddress(String address) {
        this.address = address;
    }
}
- 持久层接口 ImoocDao
在持久层目录 dao 下创建持久层接口 ImoocDao :
package cn.cdd.zookeeper.config.dao;

import cn.cdd.zookeeper.config.pojo.Imooc;
import org.springframework.stereotype.Repository;

import java.util.List;

@Repository
public interface ImoocDao {
    List<Imooc> getAllImooc();
}
- 扫描持久层目录
完成 dao 层的编写后,我们需要在 Spring Boot 主类上加入注解 @MapperScan 来扫描这个目录:
package cn.cdd.zookeeper.config;

import org.mybatis.spring.annotation.MapperScan;
import org.springframework.boot.SpringApplication;
import org.springframework.boot.autoconfigure.SpringBootApplication;

@SpringBootApplication
@MapperScan(basePackages = "cn.cdd.zookeeper.config.dao")
public class ZookeeperConfigApplication {

    public static void main(String[] args) {
        SpringApplication.run(ZookeeperConfigApplication.class, args);
    }

}
- XML 映射文件
完成上面的代码后就可以编写持久层的 XML 映射文件了,在 resources 中的 mapper 目录下新建 ImoocDao.xml 文件:
<?xml version="1.0" encoding="UTF-8"?>
<!DOCTYPE mapper PUBLIC "-//mybatis.org//DTD Mapper 3.0//EN" "http://mybatis.org/dtd/mybatis-3-mapper.dtd">
<mapper namespace="cn.cdd.zookeeper.config.dao.ImoocDao">
    <resultMap id="BaseResultMap" type="cn.cdd.zookeeper.config.pojo.Imooc">
        <id column="id" jdbcType="INTEGER" property="id"/>
        <result column="username" jdbcType="VARCHAR" property="username"/>
        <result column="password" jdbcType="VARCHAR" property="password"/>
        <result column="phone" jdbcType="VARCHAR" property="phone"/>
        <result column="address" jdbcType="VARCHAR" property="address"/>
    </resultMap>
    <select id="getAllImooc" resultMap="BaseResultMap">
        select * from imooc;
    </select>
</mapper>
- Service 层接口 ImoocService 以及实现类 ImoocServiceImpl
接下来编写 Service 层接口 ImoocService 以及实现类 ImoocServiceImpl 代码:
package cn.cdd.zookeeper.config.service;

import cn.cdd.zookeeper.config.pojo.Imooc;

import java.util.List;

public interface ImoocService {
    List<Imooc> getAllImooc();
}
实现类 ImoocServiceImpl
package cn.cdd.zookeeper.config.service.impl;

import cn.cdd.zookeeper.config.dao.ImoocDao;
import cn.cdd.zookeeper.config.pojo.Imooc;
import cn.cdd.zookeeper.config.service.ImoocService;
import org.springframework.beans.factory.annotation.Autowired;
import org.springframework.stereotype.Service;

import java.util.List;

@Service
public class ImoocServiceImpl implements ImoocService {

    @Autowired
    private ImoocDao imoocDao;

    @Override
    public List<Imooc> getAllImooc() {
        return imoocDao.getAllImooc();
    }
}
- Controller 控制层 ImoocController
实现类完成后,我们就可以编写 Controller 控制层代码了:
package cn.cdd.zookeeper.config.controller;

import cn.cdd.zookeeper.config.pojo.Imooc;
import cn.cdd.zookeeper.config.service.ImoocService;
import org.springframework.beans.factory.annotation.Autowired;
import org.springframework.web.bind.annotation.GetMapping;
import org.springframework.web.bind.annotation.RequestMapping;
import org.springframework.web.bind.annotation.RestController;

import java.util.List;

@RestController
@RequestMapping("/imooc")
public class ImoocController {

    @Autowired
    private ImoocService imoocService;

    @GetMapping("/getAll")
    public List<Imooc> getAllImooc() {
        return imoocService.getAllImooc();
    }

}
- application.yaml 配置文件
以上代码都完成后,我们来编写 application.yaml 配置文件:
spring:
  datasource:
    type: com.alibaba.druid.pool.DruidDataSource
    driver-class-name: com.mysql.cj.jdbc.Driver
    url: jdbc:mysql://localhost:3306/imooc?useUnicode=true&characterEncoding=utf8&serverTimezone=Asia/Shanghai
    username: "root"
    password: "021998"

server:
  port: 8888
  servlet:
    context-path: /

mybatis:
  mapper-locations: classpath:mapper/*.xml
- 数据库及数据表
基础部分代码编写完成,我们还需要数据库和数据表,在 MySQL 中新建数据库 imooc,然后在 imooc 库中执行以下命令创建数据表 imooc :
/\*
 Navicat Premium Data Transfer

 Source Server : localhost
 Source Server Type : MySQL
 Source Server Version : 80019
 Source Host : localhost:3306
 Source Schema : imooc

 Target Server Type : MySQL
 Target Server Version : 80019
 File Encoding : 65001

 Date: 25/09/2020 00:08:37
\*/

SET NAMES utf8mb4;
SET FOREIGN_KEY_CHECKS = 0;

-- ----------------------------
-- Table structure for imooc
-- ----------------------------
DROP TABLE IF EXISTS `imooc`;
CREATE TABLE `imooc`  (
  `id` int(0) NOT NULL AUTO\_INCREMENT,
  `username` varchar(255) CHARACTER SET utf8 COLLATE utf8_general_ci NULL DEFAULT NULL,
  `password` varchar(255) CHARACTER SET utf8 COLLATE utf8_general_ci NULL DEFAULT NULL,
  `phone` varchar(255) CHARACTER SET utf8 COLLATE utf8_general_ci NULL DEFAULT NULL,
  `address` varchar(255) CHARACTER SET utf8 COLLATE utf8_general_ci NULL DEFAULT NULL,
  PRIMARY KEY (`id`) USING BTREE
) ENGINE = InnoDB CHARACTER SET = utf8 COLLATE = utf8_general_ci ROW_FORMAT = Dynamic;

-- ----------------------------
-- Records of imooc
-- ----------------------------
INSERT INTO `imooc` VALUES (1, 'Java', '123', '123', '北京');
INSERT INTO `imooc` VALUES (2, 'Go', '321', '321', '上海');
INSERT INTO `imooc` VALUES (3, 'Python', '456', '654', '深圳');

SET FOREIGN_KEY_CHECKS = 1;
- 基础功能测试
接下来我们就可以测试这个 Spring Boot 项目了,启动主类 ZookeeperConfigApplication 的 main 方法,打开浏览器,访问 http://localhost:8888/imooc/getAll,我们就可以查询到数据库的数据:
[{"id":1,"username":"Java","password":"123","phone":"123","address":"北京"},{"id":2,"username":"Go","password":"321","phone":"321","address":"上海"},{"id":3,"username":"Python","password":"456","phone":"654","address":"深圳"}]
测试完成后,我们就可以把数据源信息交给 Zookeeper 管理,并对保存信息的节点开启监听。
2.2 Zookeeper 管理数据源配置
首先我们需要使用 Curator 客户端来连接 Zookeeper 服务端,并且在 Spring IOC 容器中拿到 dataSource,保存它的信息到节点的 data 中,然后对该节点开启监听,监听到节点更新事件后,获取节点新的信息,并更新数据源。
在 curator 目录中新建 CuratorService 类:
package cn.cdd.zookeeper.config.curator;

import com.alibaba.druid.pool.DruidDataSource;
import com.alibaba.fastjson.JSON;
import com.alibaba.fastjson.JSONObject;
import org.apache.curator.framework.CuratorFramework;
import org.apache.curator.framework.CuratorFrameworkFactory;
import org.apache.curator.framework.recipes.cache.*;
import org.apache.curator.retry.RetryForever;
import org.apache.zookeeper.data.Stat;
import org.springframework.context.ConfigurableApplicationContext;

import java.nio.charset.StandardCharsets;
import java.sql.SQLException;

public class CuratorService {

    private ConfigurableApplicationContext applicationContext;

    public CuratorService(ConfigurableApplicationContext applicationContext) {
        this.applicationContext = applicationContext;
    }

    private static final String DATASOURCE_NODE = "/imooc/datasource";

    /\*\*
 \* 构建 CuratorFramework 客户端,并开启会话
 \*
 \* @return CuratorFramework
 \*/
    public CuratorFramework buildCuratorClient() {
        // 使用 CuratorFrameworkFactory 构建 CuratorFramework
        CuratorFramework client = CuratorFrameworkFactory.builder()
            // Zookeeper 地址
            .connectString("127.0.0.1:2181")
            // 重连策略
            .retryPolicy(new RetryForever(10000))
            .build();
        // 开启会话
        client.start();
        return client;
    }

    /\*\*
 \* 保存数据源信息到 Zookeeper
 \*
 \* @param client CuratorFramework
 \* @throws Exception Exception
 \*/
    public void saveDataSource(CuratorFramework client) throws Exception {
        // 在 Spring IOC 容器中获取 dataSource
        DruidDataSource dataSource = (DruidDataSource) applicationContext.getBean("dataSource");
        JSONObject jsonObject = new JSONObject();
        jsonObject.put("DriverClassName", dataSource.getDriverClassName());
        jsonObject.put("Url", dataSource.getUrl());
        jsonObject.put("Username", dataSource.getUsername());
        jsonObject.put("Password", dataSource.getPassword());
        // 检查 Zookeeper 服务端是否存在 DATASOURCE\_NODE 节点
        Stat stat = client.checkExists().forPath(DATASOURCE_NODE);
        // 不存在则创建,并保存信息
        if (stat == null) {
            client.create().creatingParentsIfNeeded().forPath(DATASOURCE_NODE, jsonObject.toJSONString().getBytes());
        } else {
            // 存在则修改信息
            client.setData().forPath(DATASOURCE_NODE, jsonObject.toJSONString().getBytes());
        }
    }

    /\*\*
 \* 开启监听
 \*
 \* @param client CuratorFramework
 \*/
    public void startMonitoring(CuratorFramework client) {
        // 构建 CuratorCache 实例
        CuratorCache cache = CuratorCache.build(client, DATASOURCE_NODE);
        // 使用 Fluent 风格和 lambda 表达式来构建 CuratorCacheListener 的事件监听
        CuratorCacheListener listener = CuratorCacheListener.builder()
            // 开启对节点更新事件的监听
            .forChanges((oldNode, newNode) -> {
                // 从新节点获取数据
                byte[] data = newNode.getData();
                String config = new String(data, StandardCharsets.UTF_8);
                if (!config.isEmpty()) {
                    JSONObject jsonObject = JSON.parseObject(config);
                    try {
                        loadDataSource(jsonObject);
                    } catch (SQLException e) {
                        e.printStackTrace();
                    }
                    System.err.println(">>> 从配置中心更新数据源: " + config);
                }
            })
            // 初始化
            .forInitialized(() -> System.out.println(">>> CuratorCacheListener 初始化"))
            // 构建
            .build();

        // 注册 CuratorCacheListener 到 CuratorCache
        cache.listenable().addListener(listener);
        // CuratorCache 开启缓存
        cache.start();
    }

    /\*\*
 \* 加载数据源
 \*
 \* @param jsonObject 配置信息
 \* @throws SQLException SQLException
 \*/
    private void loadDataSource(JSONObject jsonObject) throws SQLException {
        // 在 Spring IOC 容器中获取 dataSource
        DruidDataSource dataSource = (DruidDataSource) applicationContext.getBean("dataSource");
        // 已经初始化的数据源需要重新启动
        if (dataSource.isInited()) {
            dataSource.restart();
        }
        // 更新数据源配置
        dataSource.setDriverClassName(jsonObject.getString("DriverClassName"));
        dataSource.setUrl(jsonObject.getString("Url"));
        dataSource.setUsername(jsonObject.getString("Username"));
        dataSource.setPassword(jsonObject.getString("Password"));
        // 数据源初始化
        dataSource.init();
    }

}
完成 CuratorService 类后,我们还需要 ConfigurableApplicationContext 来获取 IOC 容器中的 dataSource,我们可以在主类 ZookeeperConfigApplication 中获取:
package cn.cdd.zookeeper.config;

import cn.cdd.zookeeper.config.curator.CuratorService;
import org.apache.curator.framework.CuratorFramework;
import org.mybatis.spring.annotation.MapperScan;
import org.springframework.boot.SpringApplication;
import org.springframework.boot.autoconfigure.SpringBootApplication;
import org.springframework.context.ConfigurableApplicationContext;

@SpringBootApplication
@MapperScan(basePackages = "cn.cdd.zookeeper.config.dao")
public class ZookeeperConfigApplication {

    public static void main(String[] args) {
        ConfigurableApplicationContext applicationContext = SpringApplication.run(ZookeeperConfigApplication.class, args);
        try {
            // 使用 applicationContext 初始化 CuratorService
            CuratorService curatorService = new CuratorService(applicationContext);
            // 获取 Curator 客户端
            CuratorFramework client = curatorService.buildCuratorClient();
            // 保存数据源信息
            curatorService.saveDataSource(client);
            // 开启监听
            curatorService.startMonitoring(client);
        } catch (Exception e) {
            e.printStackTrace();
        }
    }

}
接下来我们就可以开启 Zookeeper ,来对数据源的变化进行测试了。
2.3 动态数据源测试
开启 Zookeeper 服务端,然后启动主类 ZookeeperConfigApplication 的 main 方法,查看控制台输出:
>>> CuratorCacheListener 初始化
这行输出说明监听已经开启了,现在就可以访问 http://localhost:8888/imooc/getAll 来查询数据库的数据了:
[{"id":1,"username":"Java","password":"123","phone":"123","address":"北京"},{"id":2,"username":"Go","password":"321","phone":"321","address":"上海"},{"id":3,"username":"Python","password":"456","phone":"654","address":"深圳"}]
访问成功,接下来我们使用 Zookeeper 命令行客户端连接 Zookeeper 服务端查询节点数据:
# 查询节点数据
get /imooc/datasource
# 打印数据
{"Username":"root","DriverClassName":"com.mysql.cj.jdbc.Driver","Url":"jdbc:mysql://localhost:3306/imooc?useUnicode=true&characterEncoding=utf8&serverTimezone=Asia/Shanghai","Password":"021998"}
我们可以看见 /imooc/datasource 节点已经保存的数据源信息了。在修改数据源信息之前,我们需要在 MySQL新建另一个数据 wiki,然后在 wiki 数据库下新建 imooc 数据表:
/\*
 Navicat Premium Data Transfer

 Source Server : localhost
 Source Server Type : MySQL
 Source Server Version : 80019
 Source Host : localhost:3306
 Source Schema : wiki

 Target Server Type : MySQL
 Target Server Version : 80019
 File Encoding : 65001

 Date: 25/09/2020 00:55:14
\*/

SET NAMES utf8mb4;
SET FOREIGN_KEY_CHECKS = 0;

-- ----------------------------
-- Table structure for imooc
-- ----------------------------
DROP TABLE IF EXISTS `imooc`;
CREATE TABLE `imooc`  (
  `id` int(0) NOT NULL AUTO\_INCREMENT,
  `username` varchar(255) CHARACTER SET utf8 COLLATE utf8_general_ci NULL DEFAULT NULL,
  `password` varchar(255) CHARACTER SET utf8 COLLATE utf8_general_ci NULL DEFAULT NULL,
  `phone` varchar(255) CHARACTER SET utf8 COLLATE utf8_general_ci NULL DEFAULT NULL,
  `address` varchar(255) CHARACTER SET utf8 COLLATE utf8_general_ci NULL DEFAULT NULL,
  PRIMARY KEY (`id`) USING BTREE
) ENGINE = InnoDB AUTO\_INCREMENT = 4 CHARACTER SET = utf8 COLLATE = utf8_general_ci ROW_FORMAT = Dynamic;

-- ----------------------------
-- Records of imooc
-- ----------------------------
INSERT INTO `imooc` VALUES (1, 'C', '789', '987', '北京');
INSERT INTO `imooc` VALUES (2, 'C#', '567', '765', '上海');
INSERT INTO `imooc` VALUES (3, 'C++', '654', '456', '深圳');

SET FOREIGN_KEY_CHECKS = 1;
完成上面的操作后,我们就可以修改数据源信息了,使用 set 命令修改 data :
# 修改 imooc 数据库为 wiki 数据库
set /imooc/datasource {"Username":"root","DriverClassName":"com.mysql.cj.jdbc.Driver","Url":"jdbc:mysql://localhost:3306/wiki?useUnicode=true&characterEncoding=utf8&serverTimezone=Asia/Shanghai","Password":"021998"}
执行修改命令后,我我们查看控制台输出:
{dataSource-0} restart
{dataSource-0} closing ...
{dataSource-0} closed
{dataSource-1} inited
>>> 从配置中心更新数据源: {"Username":"root","DriverClassName":"com.mysql.cj.jdbc.Driver","Url":"jdbc:mysql://localhost:3306/wiki?useUnicode=true&characterEncoding=utf8&serverTimezone=Asia/Shanghai","Password":"021998"}
我们发现,dataSource 重新启动并初始化了。接下来我们再访问 http://localhost:8888/imooc/getAll 来查询数据库的数据:
[{"id":1,"username":"C","password":"789","phone":"987","address":"北京"},{"id":2,"username":"C#","password":"567","phone":"765","address":"上海"},{"id":3,"username":"C++","password":"654","phone":"456","address":"深圳"}]
我们发现数据变成了 wiki 数据库的信息,说明我们的动态数据源配置成功。
3. 总结
在本节内容中,我们学习了使用配置中心的必要性,我们还使用 Spring Boot 完成了一个以 Zookeeper 为配置中心的项目,实现了动态数据源的功能。以下是本节内容总结:
- 为什么要使用配置中心。
- 使用 Spring Boot 和 Zookeeper 完成配置中心。