Zookeeper 实现集群管理
1. 前言
在分布式的应用中,我们可以把服务的提供方称为服务提供者,服务的调用方称为服务消费者,服务消费者通过调用已知的服务提供者的暴露的接口来完成自己的业务逻辑。如果服务提供者集群中有服务宕机不能提供服务了,此时服务消费者并不知道哪个服务宕机了,可能会把请求发送已经宕机的服务上。
那么服务消费者如何能动态感知服务提供者集群的变化,而不再向已经宕机的服务发送请求呢?我们的运维人员又如何知道某个服务的上下线情况呢?在本节内容中我们就来学习如何使用 Zookeeper 对分布式应用中的服务集群进行管理。
2. Zookeeper 实现集群管理
对集群管理分为两部分,一部分是监控集群中服务的运行状态,另一部分是操作集群中的服务的上下线。
我们可以让服务在启动时就把本身的地址信息注册到 Zookeeper 的临时节点上,只要这个服务一直在线,这个临时节点就会一直存在,只要这个服务与 Zookeeper 服务端断开连接时,我们就认为这个服务不可用,Zookeeper 服务端就会将这个临时节点移除。还有一种情况是我们需要这个服务下线时,我们可以利用 Zookeeper 客户端提供的 API 来删除这个临时节点。
服务消费者想要获取服务提供者集群的地址列表时,我们就可以从 Zookeeper 服务端获取服务提供者创建的临时节点,并且把这些信息缓存到本地,然后对这些临时节点的父节点开启监听。只要临时节点发生变化,服务消费者就会收到 Zookeeper 服务端的通知,并对本地缓存的地址信息进行更新。
介绍完了 Zookeeper 实现集群管理的思路,那么接下来我们就使用 Spring Boot 作为项目框架来构建服务提供者和服务消费者。
2.1 服务提供者
首先我们新建服务提供者项目,我们选择 Spring Initializr 来初始化 Spring Boot 项目,这是服务提供者的项目信息。
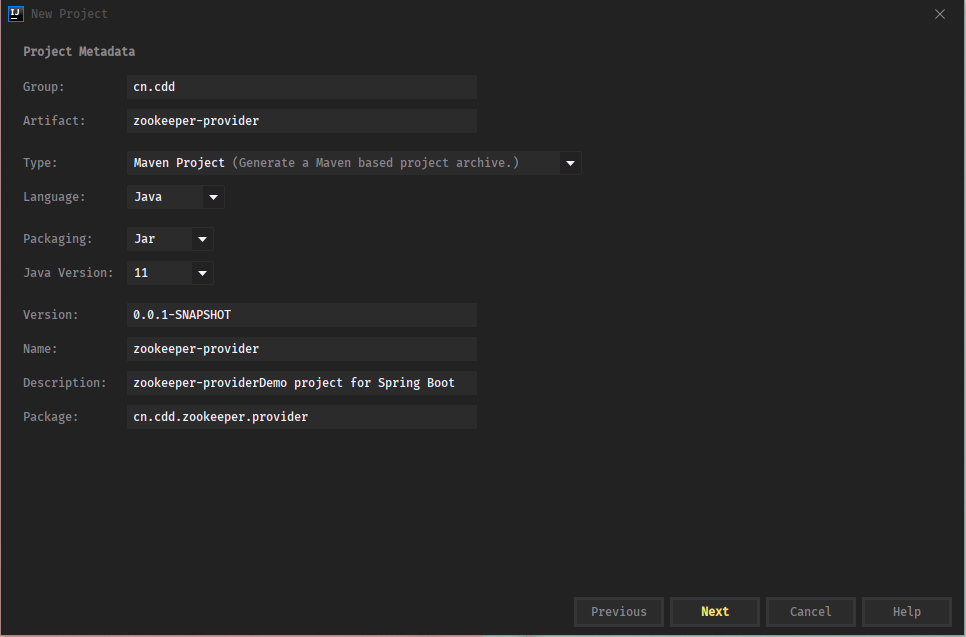
- pom.xml
初始化完成,在 pom.xml 中加入项目所需的依赖。
<?xml version="1.0" encoding="UTF-8"?>
<project xmlns="http://maven.apache.org/POM/4.0.0" xmlns:xsi="http://www.w3.org/2001/XMLSchema-instance"
 xsi:schemaLocation="http://maven.apache.org/POM/4.0.0 https://maven.apache.org/xsd/maven-4.0.0.xsd">
    <modelVersion>4.0.0</modelVersion>
    <parent>
        <groupId>org.springframework.boot</groupId>
        <artifactId>spring-boot-starter-parent</artifactId>
        <version>2.3.4.RELEASE</version>
        <relativePath/> <!-- lookup parent from repository -->
    </parent>
    <groupId>cn.cdd</groupId>
    <artifactId>zookeeper-provider</artifactId>
    <version>0.0.1-SNAPSHOT</version>
    <name>zookeeper-provider</name>
    <description>zookeeper-providerDemo project for Spring Boot</description>

    <properties>
        <java.version>11</java.version>
    </properties>

    <dependencies>
        <dependency>
            <groupId>org.springframework.boot</groupId>
            <artifactId>spring-boot-starter-web</artifactId>
        </dependency>

        <!-- curator 客户端 -->
        <dependency>
            <groupId>org.apache.curator</groupId>
            <artifactId>curator-framework</artifactId>
            <version>5.1.0</version>
        </dependency>
        <!-- curator 客户端 -->
        <dependency>
            <groupId>org.apache.curator</groupId>
            <artifactId>curator-recipes</artifactId>
            <version>5.1.0</version>
        </dependency>

        <dependency>
            <groupId>org.springframework.boot</groupId>
            <artifactId>spring-boot-starter-test</artifactId>
            <scope>test</scope>
            <exclusions>
                <exclusion>
                    <groupId>org.junit.vintage</groupId>
                    <artifactId>junit-vintage-engine</artifactId>
                </exclusion>
            </exclusions>
        </dependency>
    </dependencies>

    <build>
        <plugins>
            <plugin>
                <groupId>org.springframework.boot</groupId>
                <artifactId>spring-boot-maven-plugin</artifactId>
            </plugin>
        </plugins>
    </build>

</project>
依赖导入完成后,我们在 application.properties 配置文件中加入端口的配置。
- application.properties
server.port=8090
接下来开始编写服务提供者的接口。
- ProviderService
我们在 Spring Boot 主类的同级新建 service 目录,在 service 目录中新建 ProviderService 类。
package cn.cdd.zookeeper.provider.service;

import org.springframework.beans.factory.annotation.Value;
import org.springframework.stereotype.Service;

import java.net.InetAddress;
import java.net.UnknownHostException;

@Service
public class ProviderService {

    @Value("${server.port}")
    private String port;


    public String callMethod(){
        try {
            return "调用了服务提供者 " + InetAddress.getLocalHost().getHostAddress() + ":" + port + " 的方法";
        } catch (UnknownHostException e) {
            e.printStackTrace();
        }
        return null;
    }
}
接下来编写使用 Curator 连接 Zookeeper 服务的代码。
- CuratorService
在 service 目录下新建 CuratorService 类:
@Component
public class CuratorService implements ApplicationRunner {

    @Value("${server.port}")
    private String port;

    // CuratorFramework 客户端
    private static CuratorFramework client;
    // 服务地址临时节点的父节点
    private static final String PROVIDER_NODE = "/imooc/provider";
    // 服务地址临时节点的全路径
    private static String PROVIDER_ADDRESS;
    // 服务 ip
    private static String PROVIDER_IP;

    @Override
    public void run(ApplicationArguments args) throws Exception {
        // 获取客户端,连接 Zookeeper 服务
        buildCuratorClient();
        // 获取本机 IP
        PROVIDER_IP = InetAddress.getLocalHost().getHostAddress();
        // 注册本机地址到 Zookeeper
        registeredAddress();
    }


    /\*\*
 \* 构建 CuratorFramework 客户端,并开启会话
 \*/
    private void buildCuratorClient() {
        // 使用 CuratorFrameworkFactory 构建 CuratorFramework
        client = CuratorFrameworkFactory.builder()
                .sessionTimeoutMs(10000)
                // Zookeeper 地址
                .connectString("127.0.0.1:2181")
                // 重连策略
                .retryPolicy(new RetryForever(10000))
                .build();
        // 开启会话
        client.start();
        System.out.println(">>> 服务提供者连接 Zookeeper ");
    }

    /\*\*
 \* 注册服务地址
 \*/
    public String registeredAddress() {
        String address = null;
        try {
            Stat stat = client.checkExists().forPath(PROVIDER_NODE);
            if (stat == null) {
                client.create().creatingParentsIfNeeded().forPath(PROVIDER_NODE);
            }
            // 获取本机地址
            address = PROVIDER_IP + ":" + port;
            // 创建临时节点 /imooc/provider/192.168.0.106:8090
            PROVIDER_ADDRESS = client.create()
                    .withMode(CreateMode.EPHEMERAL)
                    .forPath(PROVIDER_NODE + "/" + address);
        } catch (Exception e) {
            e.printStackTrace();
        }
        System.out.println(">>> 本服务已上线");
        return ">>> 服务提供者 " + address + " 已上线";
    }

    /\*\*
 \* 注销服务地址
 \*/
    public String deregistrationAddress() {
        String address = null;
        try {
            Stat stat = client.checkExists().forPath(PROVIDER_ADDRESS);
            if (stat != null) {
                client.delete().forPath(PROVIDER_ADDRESS);
            }
            // 获取本机地址
            address = PROVIDER_IP + ":" + port;
        } catch (Exception e) {
            e.printStackTrace();
        }
        System.out.println(">>> 本服务已下线");
        return ">>> 服务提供者 " + address + " 已下线";
    }

}
在 CuratorService 类中,我们提供了创建 Curator 客户端的方法,注册服务地址的方法以及注销服务地址的方法。在该服务启动时,就会自动连接 Zookeeper 服务,并且把自身的地址信息注册到 Zookeeper 的临时节点上。
- ProviderController
这里我们使用 RESTful 的风格编写服务提供者对外的接口,在 service 目录同级创建 controller 目录,在 controller 中创建 ProviderController 。
@RestController
@RequestMapping("/provider")
public class ProviderController {

    @Value("${server.port}")
    private String port;

    @Autowired
    private CuratorService curatorService;

    @Autowired
    private ProviderService providerService;

     /\*\*
 \* 调用方法
 \* http://localhost:8090/provider/callMethod
 \*
 \* @return String
 \*/
    @GetMapping("/callMethod")
    public String callMethod() {
        return providerService.callMethod();
    }

    /\*\*
 \* 上线服务
 \* http://localhost:8090/provider/online
 \*
 \* @return String
 \*/
    @GetMapping("/online")
    public String registeredAddress() {
        return curatorService.registeredAddress();
    }

    /\*\*
 \* 下线服务
 \* http://localhost:8090/provider/offline
 \*
 \* @return String
 \*/
    @GetMapping("/offline")
    public String deregistrationAddress() {
        return curatorService.deregistrationAddress();
    }

}
controller 编写完毕后,我们就可以对我们的服务提供者进行测试了。
2.2 服务提供者测试
首先我们需要启动 Zookeeper 服务,然在启动服务提供者主类的 main 方法
package cn.cdd.zookeeper.provider;

import org.springframework.boot.SpringApplication;
import org.springframework.boot.autoconfigure.SpringBootApplication;

@SpringBootApplication
public class ZookeeperProviderApplication {

    public static void main(String[] args) {
        SpringApplication.run(ZookeeperProviderApplication.class, args);
    }

}
启动完成后,控制台输出:
>>> 服务提供者连接 Zookeeper
...
>>> 本服务已上线
看到服务上线的消息,我们就可以使用浏览器访问 http://localhost:8090/provider/callMethod ,观察浏览器
调用了服务提供者 192.168.0.102:8090 的方法
我们可以看到浏览器显示的信息,说明服务提供者测试成功。接下来我们就可以开始构建服务消费者项目了。
2.3 服务消费者
我们在服务提供者的同级新建项目服务消费者,使用 Spring Initializr 来初始化,以下是服务消费者的项目信息:
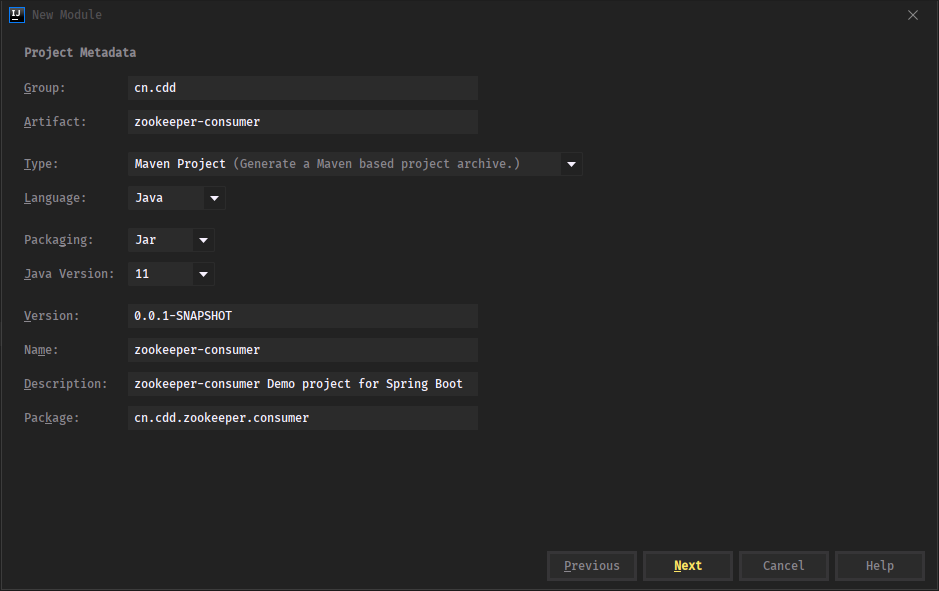
- pom.xml
初始化完成,我们在 pom.xml 文件中加入需要的依赖。
<?xml version="1.0" encoding="UTF-8"?>
<project xmlns="http://maven.apache.org/POM/4.0.0" xmlns:xsi="http://www.w3.org/2001/XMLSchema-instance"
 xsi:schemaLocation="http://maven.apache.org/POM/4.0.0 https://maven.apache.org/xsd/maven-4.0.0.xsd">
    <modelVersion>4.0.0</modelVersion>
    <parent>
        <groupId>org.springframework.boot</groupId>
        <artifactId>spring-boot-starter-parent</artifactId>
        <version>2.3.4.RELEASE</version>
        <relativePath/> <!-- lookup parent from repository -->
    </parent>
    <groupId>cn.cdd</groupId>
    <artifactId>zookeeper-consumer</artifactId>
    <version>0.0.1-SNAPSHOT</version>
    <name>zookeeper-consumer</name>
    <description>zookeeper-consumer Demo project for Spring Boot</description>

    <properties>
        <java.version>11</java.version>
    </properties>

    <dependencies>
        <dependency>
            <groupId>org.springframework.boot</groupId>
            <artifactId>spring-boot-starter-web</artifactId>
        </dependency>

        <!-- curator 客户端 -->
        <dependency>
            <groupId>org.apache.curator</groupId>
            <artifactId>curator-framework</artifactId>
            <version>5.1.0</version>
        </dependency>
        <!-- curator 客户端 -->
        <dependency>
            <groupId>org.apache.curator</groupId>
            <artifactId>curator-recipes</artifactId>
            <version>5.1.0</version>
        </dependency>

        <dependency>
            <groupId>org.springframework.boot</groupId>
            <artifactId>spring-boot-starter-test</artifactId>
            <scope>test</scope>
            <exclusions>
                <exclusion>
                    <groupId>org.junit.vintage</groupId>
                    <artifactId>junit-vintage-engine</artifactId>
                </exclusion>
            </exclusions>
        </dependency>
    </dependencies>

    <build>
        <plugins>
            <plugin>
                <groupId>org.springframework.boot</groupId>
                <artifactId>spring-boot-maven-plugin</artifactId>
            </plugin>
        </plugins>
    </build>

</project>
- application.properties
依赖导入后,我们在 application.properties 配置端口信息
server.port=9090
接下来我们编写使用 Curator 客户端连接 Zookeeper 服务的代码。
- CuratorService
在项目主类的同级新建目录 service 目录,在 service 目录下新建 CuratorService 类:
@Component
public class CuratorService implements ApplicationRunner {

    private static CuratorFramework client;
    private static final String PROVIDER_NODE = "/imooc/provider";
    private static List<String> PROVIDER_SERVER_LIST;
    private static int NUMBER_OF_REQUESTS = 0;

    @Override
    public void run(ApplicationArguments args) throws Exception {
        // 构建 CuratorFramework 客户端,并开启会话
        buildCuratorClient();
        // 获取服务列表
        getAListOfServiceAddresses();
        // 开启对 PROVIDER\_NODE 子节点变化事件的监听
        startMonitoring();
    }

    /\*\*
 \* 构建 CuratorFramework 客户端,并开启会话
 \*/
    private void buildCuratorClient() {
        // 使用 CuratorFrameworkFactory 构建 CuratorFramework
        client = CuratorFrameworkFactory.builder()
                .sessionTimeoutMs(10000)
                // Zookeeper 地址
                .connectString("127.0.0.1:2181")
                // 重连策略
                .retryPolicy(new RetryForever(10000))
                .build();
        // 开启会话
        client.start();
        System.out.println(">>> 服务消费者连接 Zookeeper ");
    }

    /\*\*
 \* 获取服务列表
 \*
 \* @throws Exception Exception
 \*/
    private void getAListOfServiceAddresses() throws Exception {
        Stat stat = client.checkExists().forPath(PROVIDER_NODE);
        if (stat == null) {
            throw new RuntimeException("服务地址未注册到 Zookeeper");
        } else {
            PROVIDER_SERVER_LIST = client.getChildren().forPath(PROVIDER_NODE);
        }
    }

    /\*\*
 \* 开启对 PROVIDER\_NODE 子节点变化事件的监听
 \*/
    public void startMonitoring() {
        // 构建 CuratorCache 实例
        CuratorCache cache = CuratorCache.build(client, PROVIDER_NODE);
        // 使用 Fluent 风格和 lambda 表达式来构建 CuratorCacheListener 的事件监听
        CuratorCacheListener listener = CuratorCacheListener.builder()
                // 开启对 PROVIDER\_NODE 节点的子节点变化事件的监听
                .forPathChildrenCache(PROVIDER_NODE, client, (curator, event) ->
                        // 重新获取服务列表
                        PROVIDER_SERVER_LIST = curator.getChildren().forPath(PROVIDER_NODE))
                // 初始化
                .forInitialized(() -> System.out.println(">>> CuratorCacheListener 初始化"))
                // 构建
                .build();

        // 注册 CuratorCacheListener 到 CuratorCache
        cache.listenable().addListener(listener);
        // CuratorCache 开启缓存
        cache.start();
    }

    /\*\*
 \* 轮询策略,按顺序获取服务地址
 \*
 \* @return 服务地址
 \*/
    public String roundRobin() {
        if (PROVIDER_SERVER_LIST.isEmpty()){
            throw new RuntimeException(">>> 服务提供者地址列表为空");
        }
        int i = NUMBER_OF_REQUESTS % PROVIDER_SERVER_LIST.size();
        NUMBER_OF_REQUESTS++;
        return PROVIDER_SERVER_LIST.get(i);
    }
}
在 CuratorService 中,我们提供了创建 Curator 客户端的方法,获取服务地址列表的方法,对父节点的子节点变化事件开启监听的方法,以及对服务的负载均衡策略的方法轮询策略。
在服务消费者启动时,连接 Zookeeper 服务,获取已注册的服务地址列表,并对服务地址临时节点的父节点开启监听。监听到子节点的变化事件时,则重新获取服务地址列表。
- ConsumerController
这里我们使用 RESTful 的风格来调用服务消费者的方法,在 service 同级创建目录 controller ,在 controller 中创建 ConsumerController 类:
@RestController
@RequestMapping("/consumer")
public class ConsumerController {

    @Autowired
    private CuratorService curatorService;

    @Autowired
    private RestTemplate restTemplate;

    /\*\*
 \* 调用方法
 \* http://localhost:9090/consumer/callMethod
 \*
 \* @return String
 \*/
    @GetMapping("/callMethod")
    public String callMethod() {
        // 轮询策略获取服务地址
        String s = curatorService.roundRobin();
        // 使用 RestTemplate 远程调用服务的 /provider/callMethod 方法,String.class 为返回值类型
        return restTemplate.getForObject("http://" + s + "/provider/callMethod", String.class);
    }
}
我们使用了 RestTemplate 来远程调用 RESTful 风格的接口,所以我们需要把 RestTemplate 注入到 Spring IOC 容器中。
- RestTemplate
我们在服务消费者项目的主类中注入Bean RestTemplate :
package cn.cdd.zookeeper.consumer;

import org.springframework.boot.SpringApplication;
import org.springframework.boot.autoconfigure.SpringBootApplication;
import org.springframework.context.annotation.Bean;
import org.springframework.web.client.RestTemplate;

@SpringBootApplication
public class ZookeeperConsumerApplication {

    public static void main(String[] args) {
        SpringApplication.run(ZookeeperConsumerApplication.class, args);
    }

    @Bean
    public RestTemplate restTemplate(){
        return new RestTemplate();
    }

}
controller 编写完毕后,我们就可以对我们的服务消费者进行测试了。
2.4 服务消费者测试
在进行服务消费者测试之前,我们可以多启动几个服务提供者实例来模拟集群中的机器。在 IDEA 中使用快捷键 alt + 8 呼出 Services 面板,右键点击 Services 面板中的 ZookeeperProviderApplication ,选择 copy Configuration 复制我们的服务提供者,在弹出的 Edit Configuration 界面中,修改实例名称,添加 VM options 参数 -Dserver.port=8091 来修改启动端口号为 8091 ,点击 OK 确认。
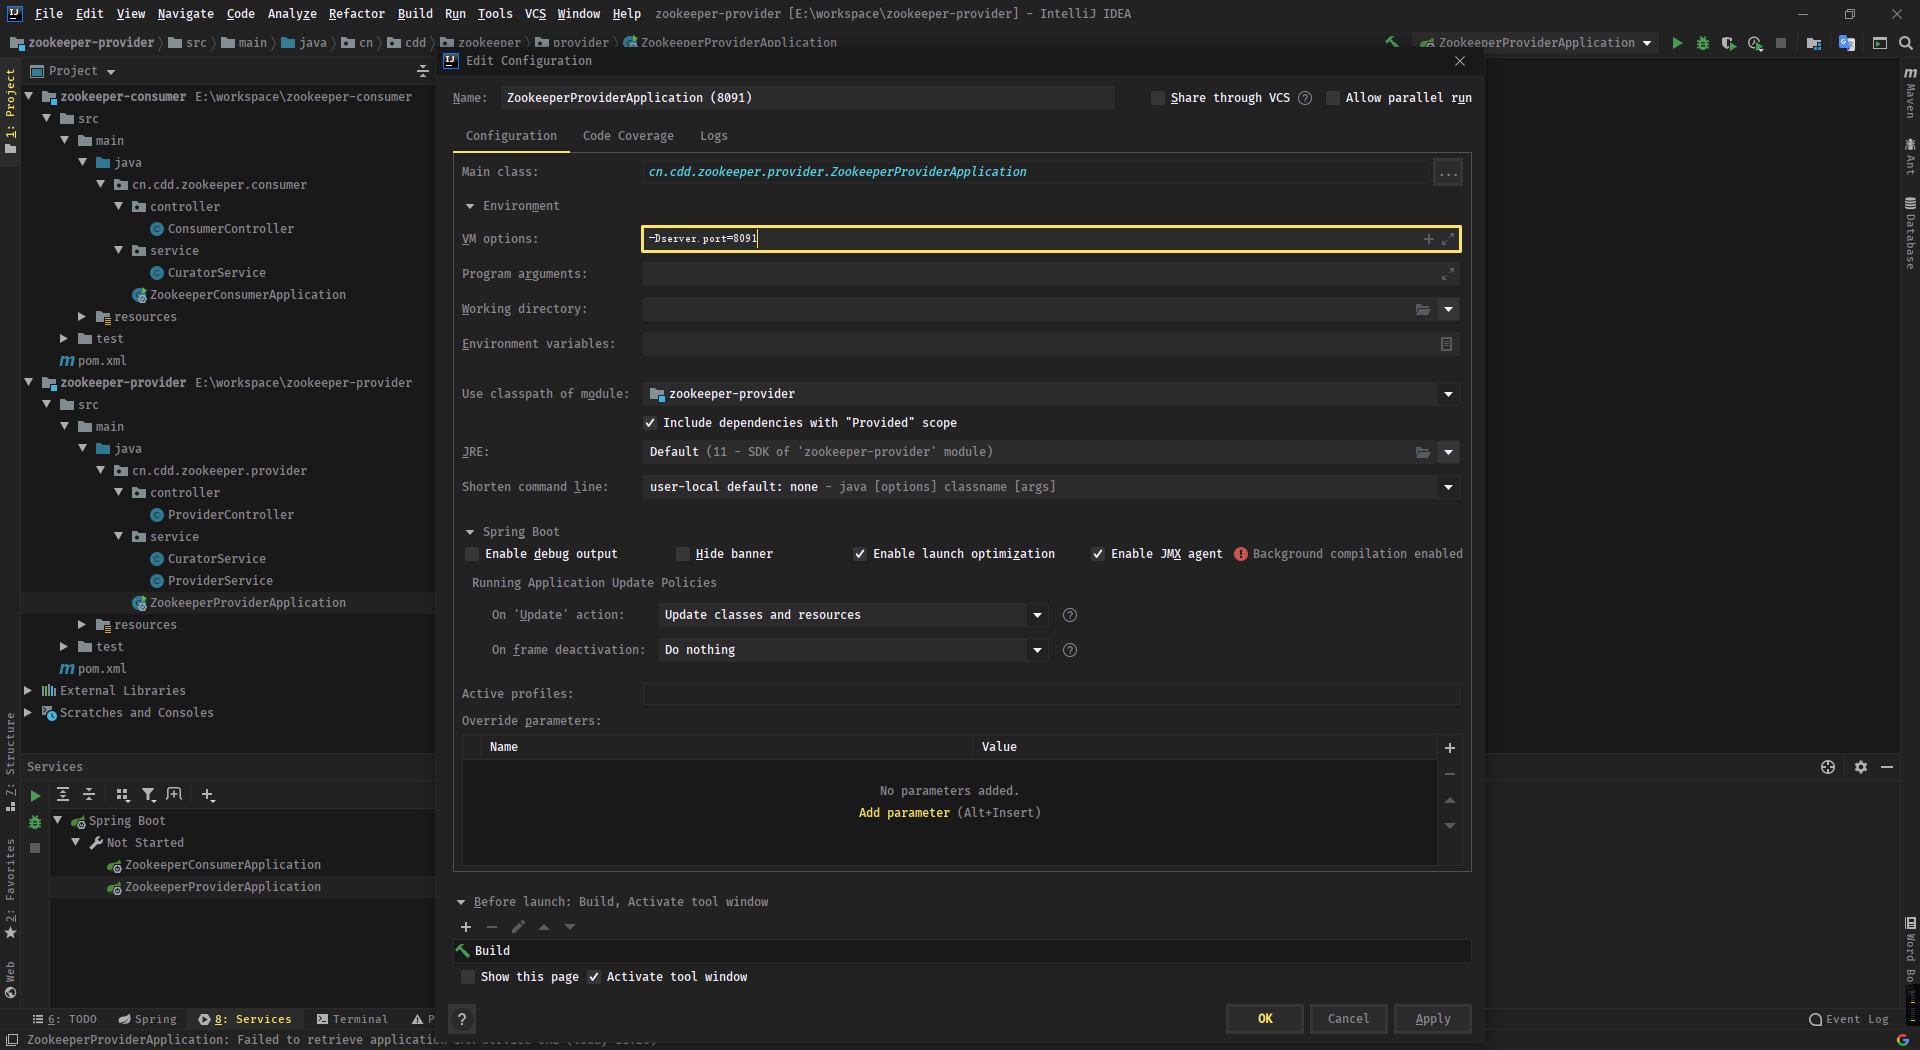
在这里我们复制了两个服务提供者,也就是说一共有 3 个服务提供者来提供服务。

保持 Zookeeper 服务端的启动,然后依次启动 3 个服务提供者,观察控制台,我们可以看到 3 个服务提供者都输出了服务上线的信息:
>>> 服务提供者连接 Zookeeper
...
>>> 本服务已上线
服务提供者启动完毕,接下来我们就可以启动服务消费者来进行测试了,启动服务消费者,观察控制台:
>>> 服务消费者连接 Zookeeper
...
>>> CuratorCacheListener 初始化
我们可以看到,服务消费者连接上了 Zookeeper 服务器,并且开启了监听,接下来我们就可以访问服务消费者的 RESTful 接口来测试了,访问 http://localhost:9090/consumer/callMethod ,查看浏览器内容:
调用了服务提供者 192.168.0.102:8090 的方法
刷新页面,再次访问:
调用了服务提供者 192.168.0.102:8091 的方法
再次刷新页面进行访问:
调用了服务提供者 192.168.0.102:8092 的方法
我们可以发现,服务消费者依次调用了 8090 ,8091 ,8092 这 3 个服务提供者的方法,并且实现了轮询的负载均衡策略。
测试成功后,我们就可以模拟对集群管理的各种场景了。
2.5 服务提供者上下线测试
首先我们来测试服务下线的情况,服务提供者下线分为两种情况,一种是服务出现故障,与 Zookeeper 服务端断开连接时,另一种是业务需求手动对服务进行下线处理。
- 服务停机
我们先来测试服务停机时的情况,这里我们手动关闭端口为 8092 的服务,模拟服务停机,等待会话超时,Zookeeper 服务端就会移除会话失效的临时节点,然后再次访问服务消费者的接口 http://localhost:9090/consumer/callMethod :
调用了服务提供者 192.168.0.102:8090 的方法
刷新页面,再次访问:
调用了服务提供者 192.168.0.102:8091 的方法
再次刷新页面进行访问:
调用了服务提供者 192.168.0.102:8090 的方法
我们发现端口为 8092 的服务已经无法被访问了,但是服务消费者并没有发生异常,说明服务下线成功。这里我们还可以在节点监听的回掉方法中发送短信或邮件通知系统管理员,提醒他们服务下线了。
接下来我们测试手动把服务提供者下线的情况。
- 手动下线
如果某个服务需要手动下线,我们就可以访问我们在服务提供者中提供的下线方法,这里我们把端口为 8091 的服务下线,访问 http://localhost:8091/provider/offline ,查看浏览器:
>>> 服务提供者 192.168.0.102:8091 已下线
我们发现端口为 8091 的服务已经下线了,手动下线的情况我们不需要等待会话超时,因为这个会话还存活着,接下来我们就可以再次访问服务消费者的接口 http://localhost:9090/consumer/callMethod :
调用了服务提供者 192.168.0.102:8090 的方法
我们发现现在只有端口为 8090 的服务能提供服务了,说明服务下线成功了。
测试完服务下线的情况,我们来对服务进行上线测试,上线也同样分为两种情况,一种是停机的服务重新启动成功时会注册自身的地址到 Zookeeper 服务,另一种是把手动下线的服务手动进行上线,手动上线的过程同样是注册自身的地址信息到 Zookeeper 服务,接下来我们就同时测试上面两种服务上线的情况。
- 服务启动 + 手动上线
首先我们启动上面停机的 8092 服务,然后调用端口为 8091 的手动上线方法 http://localhost:8091/provider/online ,执行完成后,我们就可以使用服务消费着来进行测试了,调用服务消费者的接口 http://localhost:9090/consumer/callMethod 查看浏览器内容:
调用了服务提供者 192.168.0.102:8090 的方法
刷新页面,再次访问:
调用了服务提供者 192.168.0.102:8091 的方法
再次刷新页面进行访问:
调用了服务提供者 192.168.0.102:8092 的方法
我们可以发现,服务消费者依次调用了 8090 ,8091 ,8092 这 3 个服务提供者的方法,并且实现了轮询的负载均衡策略,说明我们的服务上线成功
3. 总结
在本节内容中,我们学习了分布式服务的环境中,对服务管理的重要性,我们还使用了 Spring Boot 模拟了服务提供者和服务消费者,并模拟了服务提供者集群,成功使用 Zookeeper 对集群的地址进行管理监控,还实现了对集群中服务的上下线的控制。以下是本节内容总结:
- 分布式环境中对集群管理的重要性。
- 如何使用 Zookeeper 完成对集群的管理。