Spring AOP 实现之 XML 配置
1. 前言
大家好,本小节,我们学习 Spring 框架中基于代理模式实现的 AOP。关于什么是代理模式,我们在前两个小节已经详细介绍过概念,并演示了代理模式的使用。
可能大家也有了一些体会,我们可以使用代理模式来对我们的一些功能方法做增强。只不过有一些不如人意的地方:
- 自定义代理模式代码编写过于臃肿
- 侵入性比较强,代码不够优雅
- 控制事务的实现过于繁琐。
疑问导出:
如何简单轻便优雅地解决这种问题呢?当然就是我们的主角 Spring 的 AOP 啦。
对于 AOP ,我们也已经详细解释过它的概念,对于 Spring 框架中的 AOP 实例,就在本小节做一个简单的实现。
2. 实例演示
2.1 工程搭建介绍
数据库表结构:
建表 SQL 语句如下:
CREATE TABLE `account` (
  `id` int(11) NOT NULL auto\_increment COMMENT 'id',
  `accountNum` varchar(20) default NULL COMMENT '账号',
  `money` int(8) default NULL COMMENT '余额',
  PRIMARY KEY  (`id`)
) ENGINE=InnoDB AUTO\_INCREMENT=3 DEFAULT CHARSET=utf8

工程代码介绍:
- 实体类: 跟数据库表对应的 Java 类 Account ;
- 操作实体类的: Dao 和 Dao 的接口实现类 ;
- 调用持久层的业务类: Service 和 Service 的实现类 ;
- 事务管理器类: TransactionManager 提供事务的一系列操作 ;
- 测试代码类: 初始化 Spring 调用类中的方法测试 。
思路介绍:
本测试案例同前两个小节实现的目的完全一致,不同的在于本小节使用 Spring 的 AOP 替代代理类。先回顾下 AOP 中的核心概念:
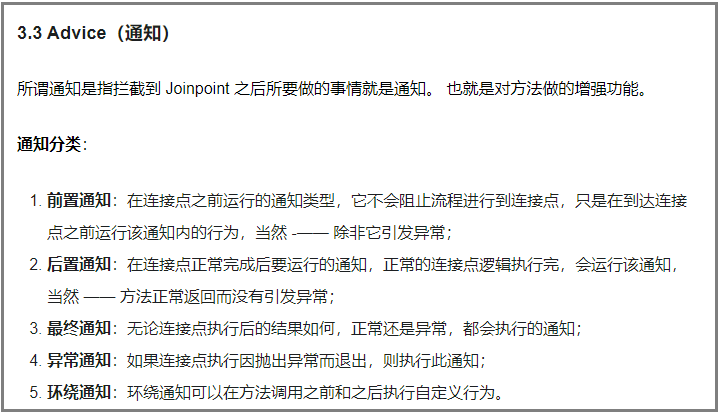
所以:对原始业务类中的方法增强行为也就是 Spring 的 AOP 中所谓的前置通知,在对原始业务类中的方法执行之后的增强行为就是后置通知。
而一旦出现异常,那么所做的动作就是异常通知。本案例使用几种通知,来实现事务的控制。
2.2 代码实现
- 创建 maven 工程:

pom 文件的 jar 包坐标如下:
<dependencies>
    <dependency>
        <groupId>org.springframework</groupId>
        <artifactId>spring-context</artifactId>
        <version>5.0.2.RELEASE</version>
    </dependency>
    <dependency>
        <groupId>org.springframework</groupId>
        <artifactId>spring-test</artifactId>
        <version>5.0.2.RELEASE</version>
    </dependency>
    <dependency>
        <groupId>commons-dbutils</groupId>
        <artifactId>commons-dbutils</artifactId>
        <version>1.4</version>
    </dependency>

    <dependency>
        <groupId>mysql</groupId>
        <artifactId>mysql-connector-java</artifactId>
        <version>5.1.6</version>
    </dependency>

    <dependency>
        <groupId>c3p0</groupId>
        <artifactId>c3p0</artifactId>
        <version>0.9.1.2</version>
    </dependency>

    <dependency>
        <groupId>junit</groupId>
        <artifactId>junit</artifactId>
        <version>4.12</version>
    </dependency>
    <dependency>
        <groupId>org.aspectj</groupId>
        <artifactId>aspectjweaver</artifactId>
        <version>1.8.7</version>
    </dependency>
</dependencies>
- 实体类 Account
public class Account implements Serializable {
    //数据id
    private Integer id;
    //账号编码
    private String accountNum;
    //账号金额
    private Float money;

    //省略get 和set 方法
}
- 数据库连接工具类
public class ConnectionUtils {

    private ThreadLocal<Connection> tl = new ThreadLocal<Connection>();

    private DataSource dataSource;

    public void setDataSource(DataSource dataSource) {
        this.dataSource = dataSource;
    }

    /\*\*
 \* 获取当前线程上的连接
 \* @return
 \*/
    public Connection getThreadConnection() {
        try{
            //1.先从ThreadLocal上获取
            Connection conn = tl.get();
            //2.判断当前线程上是否有连接
            if (conn == null) {
                //3.从数据源中获取一个连接,并且存入ThreadLocal中
                conn = dataSource.getConnection();
                tl.set(conn);
            }
            //4.返回当前线程上的连接
            return conn;
        }catch (Exception e){
            throw new RuntimeException(e);
        }
    }

    /\*\*
 \* 把连接和线程解绑
 \*/
    public void removeConnection(){
        tl.remove();
    }
}
- 持久层 dao 和 dao 的 实现类:
//dao的接口
public interface IAccountDao {
    /\*\*
 \* 更新
 \* @param account
 \*/
    void updateAccount(Account account);
    /\*\*
 \* 根据编号查询账户
 \*/
    Account findAccountByNum(String accountNum);
}
//dao的实现类
public class AccountDaoImpl implements IAccountDao {
    //dbutil的查询工具类
    private QueryRunner runner;
    //连接的工具类
    private ConnectionUtils connectionUtils;

    public void setRunner(QueryRunner runner) {
        this.runner = runner;
    }

    public void setConnectionUtils(ConnectionUtils connectionUtils) {
        this.connectionUtils = connectionUtils;
    }

    //修改账号
    public void updateAccount(Account account) {
        try{
            runner.update(connectionUtils.getThreadConnection(),"update account set accountNum=?,money=? where id=?",account.getAccountNum(),account.getMoney(),account.getId());
        }catch (Exception e) {
            throw new RuntimeException(e);
        }
    }
    //根据账号查询
    public Account findAccountByNum(String accountNum) {
        try{
            List<Account> accounts = runner.query(connectionUtils.getThreadConnection(),"select \* from account where accountNum = ? ",new BeanListHandler<Account>(Account.class),accountNum);
            if(accounts == null || accounts.size() == 0){
                return null;
            }
            if(accounts.size() > 1){
                throw new RuntimeException("结果集不唯一,数据有问题");
            }
            return accounts.get(0);
        }catch (Exception e) {
            throw new RuntimeException(e);
        }
    }
}
- 业务类 Service 和 Service 的实现类
//业务接口
public interface IAccountService {
    /\*\*
 \* 转账
 \* @param sourceAccount 转出账户名称
 \* @param targetAccount 转入账户名称
 \* @param money 转账金额
 \*/
    void transfer(String sourceAccount, String targetAccount, Integer money);

}
//业务实现类
public class AccountServiceImpl implements IAccountService {
    //持久层对象
    private IAccountDao accountDao;
    //省略 set 和 get 方法

    //转账的方法
    public void transfer(String sourceAccount, String targetAccount, Integer money) {
        //查询原始账户
        Account source = accountDao.findAccountByNum(sourceAccount);
        //查询目标账户
        Account target = accountDao.findAccountByNum(targetAccount);
        //原始账号减钱
        source.setMoney(source.getMoney()-money);
        //目标账号加钱
        target.setMoney(target.getMoney()+money);
        //更新原始账号
        accountDao.updateAccount(source);
        //更新目标账号
        accountDao.updateAccount(target);
        System.out.println("转账完毕");

    }
}
- 事务管理器类
package com.offcn.transaction;
/\*\*
 \* @Auther: wyan
 \* @Date: 2020-05-26 21:20
 \* @Description:
 \*/
import com.offcn.utils.ConnectionUtils;

/\*\*
 \* 和事务管理相关的工具类,它包含了,开启事务,提交事务,回滚事务和释放连接
 \*/
public class TransactionManager {

    private ConnectionUtils connectionUtils;

    public void setConnectionUtils(ConnectionUtils connectionUtils) {
        this.connectionUtils = connectionUtils;
    }
    /\*\*
 \* 开启事务
 \*/
    public  void beginTransaction(){
        try {
            System.out.println("开启事务");
            connectionUtils.getThreadConnection().setAutoCommit(false);
        }catch (Exception e){
            e.printStackTrace();
        }
    }
    /\*\*
 \* 提交事务
 \*/
    public  void commit(){
        try {
            System.out.println("提交事务");
            connectionUtils.getThreadConnection().commit();
        }catch (Exception e){
            e.printStackTrace();
        }
    }
    /\*\*
 \* 回滚事务
 \*/
    public  void rollback(){
        try {
            System.out.println("回滚事务");
            connectionUtils.getThreadConnection().rollback();
        }catch (Exception e){
            e.printStackTrace();
        }
    }
    /\*\*
 \* 释放连接
 \*/
    public  void release(){
        try {
            System.out.println("释放连接");
            connectionUtils.getThreadConnection().close();//还回连接池中
            connectionUtils.removeConnection();
        }catch (Exception e){
            e.printStackTrace();
        }
    }
}
代码解释:此工具类就作为 Spring 使用 AOP 管理事务的通知类,里面的各个方法用于配置 Spring 的通知使用。为了测试效果,在每个通知方法内,我们输出打印了测试语句。
- 配置文件中添加 AOP 的相关配置
<?xml version="1.0" encoding="UTF-8"?>
<beans xmlns="http://www.springframework.org/schema/beans"
 xmlns:xsi="http://www.w3.org/2001/XMLSchema-instance"
 xsi:schemaLocation="http://www.springframework.org/schema/beans
 http://www.springframework.org/schema/beans/spring-beans.xsd">

    <!-- 配置Service -->
    <bean id="accountService" class="com.offcn.service.impl.AccountServiceImpl">
        <property name="accountDao" ref="accountDao"></property>
    </bean>
    <!--配置Dao对象-->
    <bean id="accountDao" class="com.offcn.dao.impl.AccountDaoImpl">
        <property name="runner" ref="runner"></property>
        <property name="connectionUtils" ref="connectionUtils"></property>
    </bean>
    <!--配置QueryRunner-->
    <bean id="runner" class="org.apache.commons.dbutils.QueryRunner" scope="prototype"></bean>
    <!-- 配置数据源 -->
    <bean id="dataSource" class="com.mchange.v2.c3p0.ComboPooledDataSource">
        <!--连接数据库的必备信息-->
        <property name="driverClass" value="com.mysql.jdbc.Driver"></property>
        <property name="jdbcUrl" value="jdbc:mysql://localhost:3306/transmoney"></property>
        <property name="user" value="root"></property>
        <property name="password" value="root"></property>
    </bean>
    <!-- 配置Connection的工具类 ConnectionUtils -->
    <bean id="connectionUtils" class="com.offcn.utils.ConnectionUtils">
        <!-- 注入数据源-->
        <property name="dataSource" ref="dataSource"></property>
    </bean>

     <!-- 配置事务管理器-->
    <bean id="txManager" class="com.offcn.transaction.TransactionManager">
        <!-- 注入ConnectionUtils -->
        <property name="connectionUtils" ref="connectionUtils"></property>
    </bean>
    <!-- aop相关的节点配置 -->
     <aop:config>
        <aop:pointcut expression="execution ( \* com.offcn.service.\*.\*(..))" id="pc"/>
        <aop:aspect ref="txManager">
            <aop:before method="beginTransaction" pointcut-ref="pc"/>
            <aop:after-returning method="commit" pointcut-ref="pc"/>
            <aop:after method="release" pointcut-ref="pc"/>
            <aop:after-throwing method="rollback" pointcut-ref="pc"/>
        </aop:aspect>
    </aop:config>

</beans>
配置文件说明:
- connectionUtils: 是获取数据库连接的工具类;
- dataSource: 采用 c3p0 数据源,大家一定要注意数据库的名称与账号名和密码;
- queryRunner: dbutils 第三方框架提供用于执行 SQL 语句,操作数据库的一个工具类;
- accountDao 和 accountService: 是我们自定义的业务层实现类和持久层实现类;
- aop:config: 此节点是新增加 AOP 配置,AOP 相关信息都在这;
- aop:pointcut: 此节点是切入点,表示哪些类的哪些方法在执行的时候会应用 Spring 配置的通知进行增强;
- aop:aspect: 此节点是配置切面类的节点,在 AOP 介绍的小节解释过,它的作用主要就是整合通知和切入点。
null 前置、后置、异常、和最终。可以看得出来 before 前置通知执行的方法是开启事务, after-returning 成功执行的方法是提交事务,after 最终执行的方法是释放连接,after-throwing 出现异常执行的方法是回滚。
- 测试类代码
@RunWith(SpringJUnit4ClassRunner.class)
@ContextConfiguration(locations = "classpath:applicationContext.xml")
public class AccountServiceTest {

    @Autowired
    private IAccountService accountService;

    @Test
    public  void testTransfer(){
        accountService.transfer("622200009999","622200001111",100);
    }
}
测试结果:
执行代码后结果:
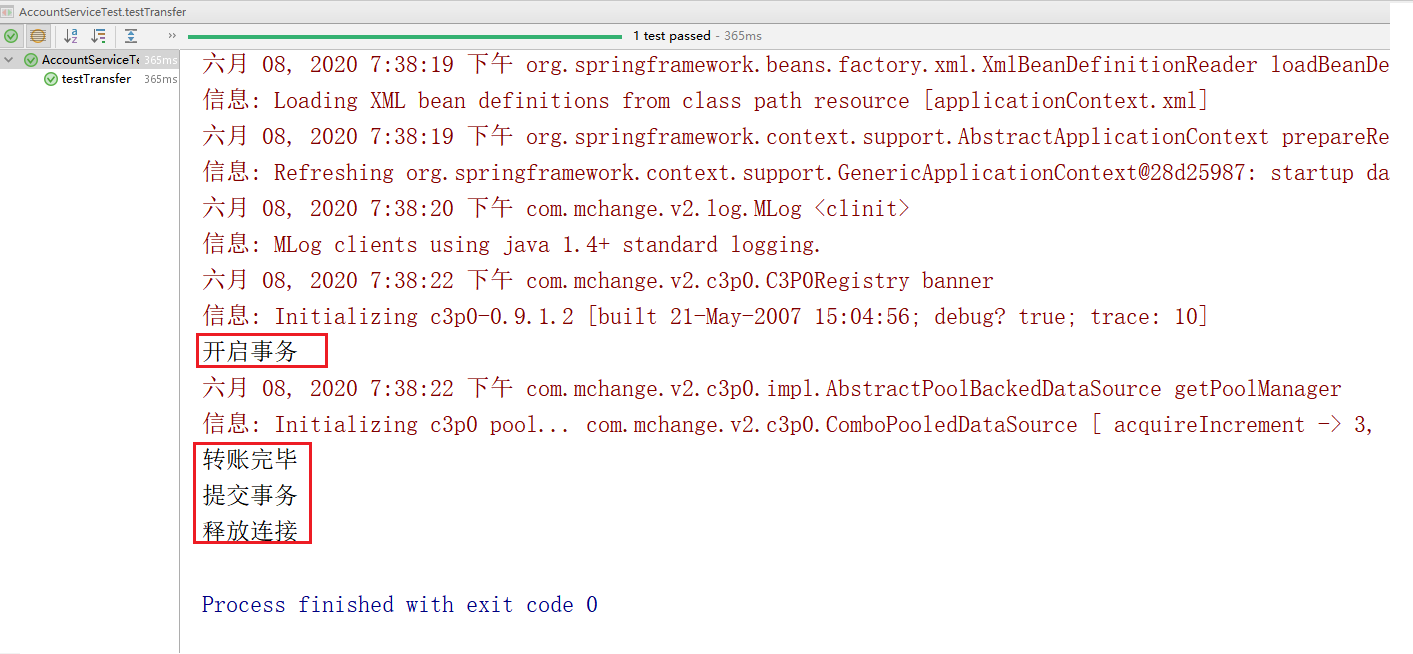
可以看到,我们通过在 xml 文件中配置 Spring 的 AOP 相关配置,就可以实现对我们业务类中的方法实现了增强,无需自定义对业务类做代理实现。
3. 小结
本小节学习了 Spring 中 AOP 的使用,那么哪些要求大家掌握的呢?
- AOP 的相关概念,什么是切面,什么是通知,什么是切入点;
- 通知的几种类型,以及他们的执行时机;
- 如何在 Spring 配置文件中使用 xml 的方式实现 AOP。