Spring 的声明式事务控制
1. 前言
各位同学大家好,long time no see.
本小节,我给大家带来 Spring 对于事务的另外一种支持方式,也就是声明式事务的配置。其实声明式配置和 xml 文件的配置,孰优孰劣并不是重点。
Spring 框架设计两种模式的初衷更多是体现技术的多样性,毕竟条条大路通罗马。您说呢?所以本小节重点就看如果使用注解来对事务做支持,那么我们应该如何做,又有哪些需要注意点地方。
各位看官,随我来,不要掉队哦…
课程回顾:
老套路,首先我们回顾一下 xml 对于事务支持的实现:
- 在 Spring 的 xml 配置文件中,使用 bean 标签初始化配置事务的管理器类 DataSourceTransactionManager;
- 在 Spring 的 xml 配置文件中,通过 tx:advice 节点配置事务使用的通知方式,已经支持的事务级别;
- 在 Spring 的 xml 配置文件中,通过 aop:config 节点指定切入点,说明哪些类的哪些方法需要支持事务,同时将配置的切入点和通知整合到一起。
xml 的方式回顾之后,就看我们使用注解如何替换掉上面的必要配置吧…
2. 实例演示
2.1 工程搭建
1. 创建工程
2. 引入依赖
<dependencies>
        <dependency>
            <groupId>org.springframework</groupId>
            <artifactId>spring-context</artifactId>
            <version>5.0.2.RELEASE</version>
        </dependency>
        <!-- Spring jdbc 使用的依赖-->
        <dependency>
            <groupId>org.springframework</groupId>
            <artifactId>spring-jdbc</artifactId>
            <version>5.0.2.RELEASE</version>
        </dependency>

        <dependency>
            <groupId>org.springframework</groupId>
            <artifactId>spring-tx</artifactId>
            <version>5.0.2.RELEASE</version>
        </dependency>

        <dependency>
            <groupId>mysql</groupId>
            <artifactId>mysql-connector-java</artifactId>
            <version>5.1.6</version>
        </dependency>
        <dependency>
            <groupId>org.aspectj</groupId>
            <artifactId>aspectjweaver</artifactId>
            <version>1.8.7</version>
         </dependency>
    </dependencies>
3. 准备代码
实体类代码
/\*\*
 \* 账户的实体类
 \*/
public class Account implements Serializable {
    //数据id
    private Integer id;
    //账号编码
    private String accountNum;
    //账号金额
    private Float money;
}
持久层接口代码
/\*\*
 \* 账户的持久层接口
 \*/
public interface IAccountDao {

    /\*\*
 \* 根据Id查询账户
 \* @param accountId
 \* @return
 \*/
    Account findAccountById(Integer accountId);

    /\*\*
 \* 保存账户
 \* @param account
 \*/
    void saveAccount(Account account);

    /\*\*
 \* 更新账户
 \* @param account
 \*/
    void updateAccount(Account account);


}
持久层实现类代码
/\*\*
 \* 账户的持久层实现类
 \*/
@Repository
public class AccountDaoImpl implements IAccountDao {
    //jdbc模板类属性
    @Autowired
    private JdbcTemplate jdbcTemplate;

    //根据id查找
    public Account findAccountById(Integer accountId) {
        List<Account> accounts = jdbcTemplate.query("select \* from account where id = ?",new BeanPropertyRowMapper<Account>(Account.class),accountId);
        return accounts.isEmpty()?null:accounts.get(0);
    }

    public void saveAccount(Account account) {
        jdbcTemplate.update("insert into account values(?,?,?)",
                account.getId(),account.getAccountNum(),account.getMoney());
    }

    public void updateAccount(Account account) {
        jdbcTemplate.update("update account set accountnum=?,money=? where id=?",account.getAccountNum(),account.getMoney(),account.getId());
    }
}
业务层接口代码
/\*\*
 \* @Auther: wyan
 \*/
public interface UserService {

    /\*\*
 \* 账户转账
 \* @param fromId toId
 \*/
    public void transMoney(Integer fromId, Integer toId, Integer money);

}
业务层实现类代码
/\*\*
 \* @Auther: wyan
 \* @Description:
 \*/
@Service
@Transactional
public class UserServiceImpl implements UserService {

    @Autowired
    private IAccountDao accountDao;

    public void transMoney(Integer fromId, Integer toId, Integer money) {
        Account fromAccount = accountDao.findAccountById(fromId);
        Account toAccount = accountDao.findAccountById(toId);
        //原始账号减钱
        fromAccount.setMoney(fromAccount.getMoney()-money);
        accountDao.updateAccount(fromAccount);
        //抛出异常
        int i=1/0;
        //转账账号加钱
        toAccount.setMoney(toAccount.getMoney()+money);
        accountDao.updateAccount(toAccount);
    }
}
Tips: 此时需要注意注解
@Transactional的含义。
Transactional 就是表示事务,那么在此类上面加入注解,说明需要 Spring 框架针对此类的方法做事务的增强行为,也就是说此注解其实是相当于我们在配置文件中配置的节点 tx:advice。
那么这时候有的细心的同学可能会有些疑问:
- 我们在 xml 文件中可以配置事务的传播行为与隔离级别,那么这一个注解如何制定事务的传播行为与隔离级别呢?
- 一个类中如果定义方法过多,而实际上需要增强控制事务的方法只有一部分,如何缩小粒度,只控制需要事务的方法呢?
ok,大家。这里有必要跟大家解释下此注解的其余使用方式:
问题一答疑:
在注解后面可以通过括号内的参数设置隔离级别与传播行为。比如:
@Transactional(propagation = Propagation.REQUIRED,isolation = Isolation.READ_COMMITTED)此表达式的含义是事务一定需要,并且是读已提交。问题二答疑:
在方法上使用注解。类上面可以不使用
@Transactional注解,而是将注解写在需要用到事务的方法之上。
4. 配置文件
<?xml version="1.0" encoding="UTF-8"?>
<beans xmlns="http://www.springframework.org/schema/beans"
xmlns:xsi="http://www.w3.org/2001/XMLSchema-instance"
xmlns:aop="http://www.springframework.org/schema/aop"
xmlns:tx="http://www.springframework.org/schema/tx"
xmlns:context="http://www.springframework.org/schema/context"
xsi:schemaLocation="http://www.springframework.org/schema/beans
http://www.springframework.org/schema/beans/spring-beans.xsd
http://www.springframework.org/schema/aop
http://www.springframework.org/schema/aop/spring-aop.xsd
http://www.springframework.org/schema/tx
http://www.springframework.org/schema/tx/spring-tx.xsd
http://www.springframework.org/schema/context http://www.springframework.org/schema/context/spring-context.xsd">
<!--配置JdbcTemplate-->
<bean id="jdbcTemplate" class="org.springframework.jdbc.core.JdbcTemplate">
<property name="dataSource" ref="dataSource"></property>
</bean>
<!-- 配置数据源-->
<bean id="dataSource" class="org.springframework.jdbc.datasource.DriverManagerDataSource">
<property name="driverClassName" value="com.mysql.jdbc.Driver"></property>
<property name="url" value="jdbc:mysql:///transmoney"></property>
<property name="username" value="root"></property>
<property name="password" value="root"></property>
</bean>
<!--包路径扫描-->
<context:component-scan base-package="com.offcn"></context:component-scan>
<!--事务管理器-->
<bean id="transactionManager" class="org.springframework.jdbc.datasource.DataSourceTransactionManager">
<property name="dataSource" ref="dataSource"></property>
</bean>
<!--注解事务驱动-->
<tx:annotation-driven/>
</beans>
Tips: 此处需要注意
tx:annotation-driven节点
无需配置通知节点与切面节点,而是使用 tx:annotation-driven 节点表示,事务的支持方式为声明式事务。
5. 测试代码
public class AccountServiceTest {

    public static void main(String[] args) {
        //1.获取容器
        ApplicationContext ac = new ClassPathXmlApplicationContext("applicationContext.xml");
        //2.获取业务对象
        UserService userService = ac.getBean(UserService.class);
        //3.从id为1的账号转成1000到2账号
        userService.transMoney(1,2,1000);
        System.out.println("转账完成..");
    }
}
6. 测试结果:

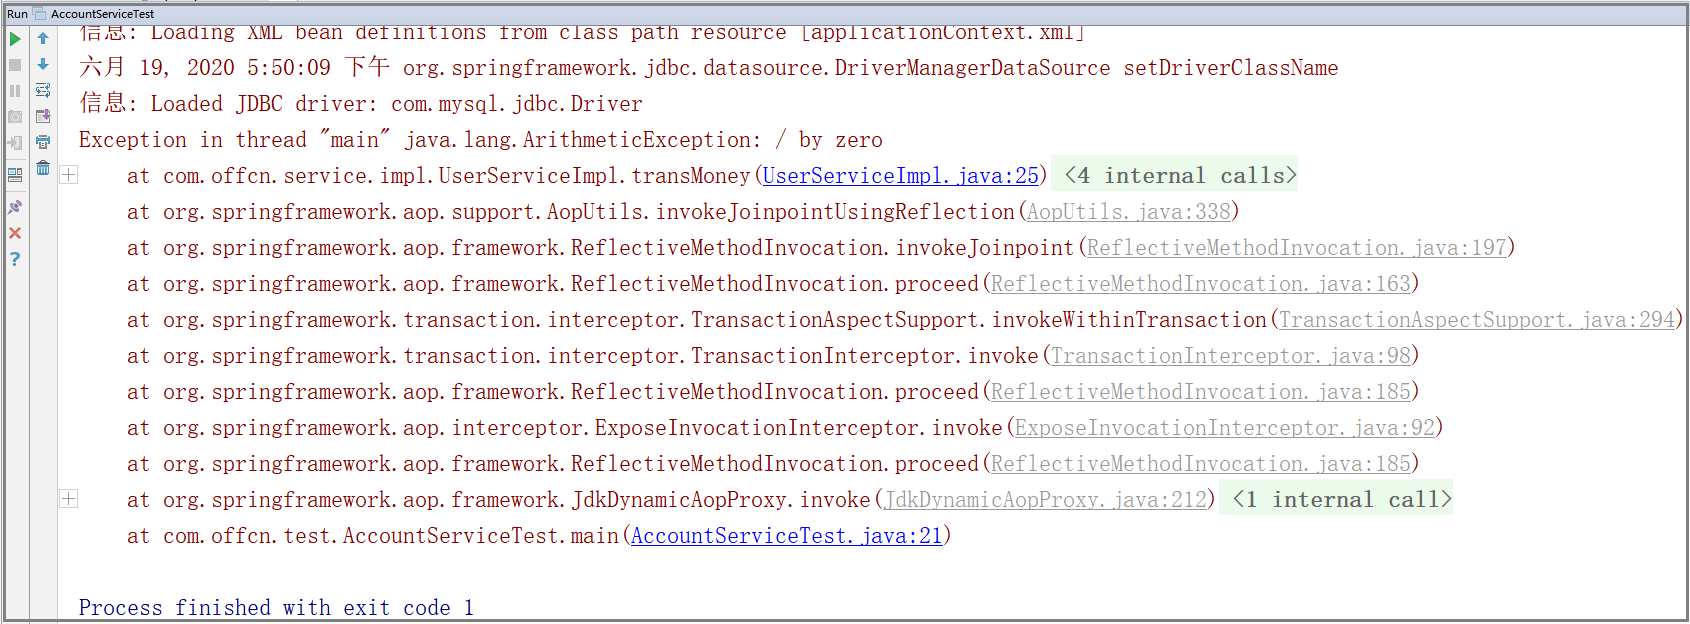
ok, 大家,我们继续测试之前的转账代码,依然得到错误的异常信息。同时数据库的金额并没有发生改变,因为事务的控制,保证了数据的一致性原子性。那么也证明我们声明式事务的案例测试成功。
3. 总结
Spring 的声明式事务,我们今天就到这里。通过本小节,我们知道声明式事务实现一样很简单:
- xml 文件中开启注解驱动
tx:annotation-driven; - 在实现类上使用
@Transactional注解。
上面两个步骤即可实现声明式事务的控制,配置更为简洁,代码可读性也更强。你学会了吗?
如果你问我,什么是达到成功最有效的方法,我会告诉你 —— 坚持!