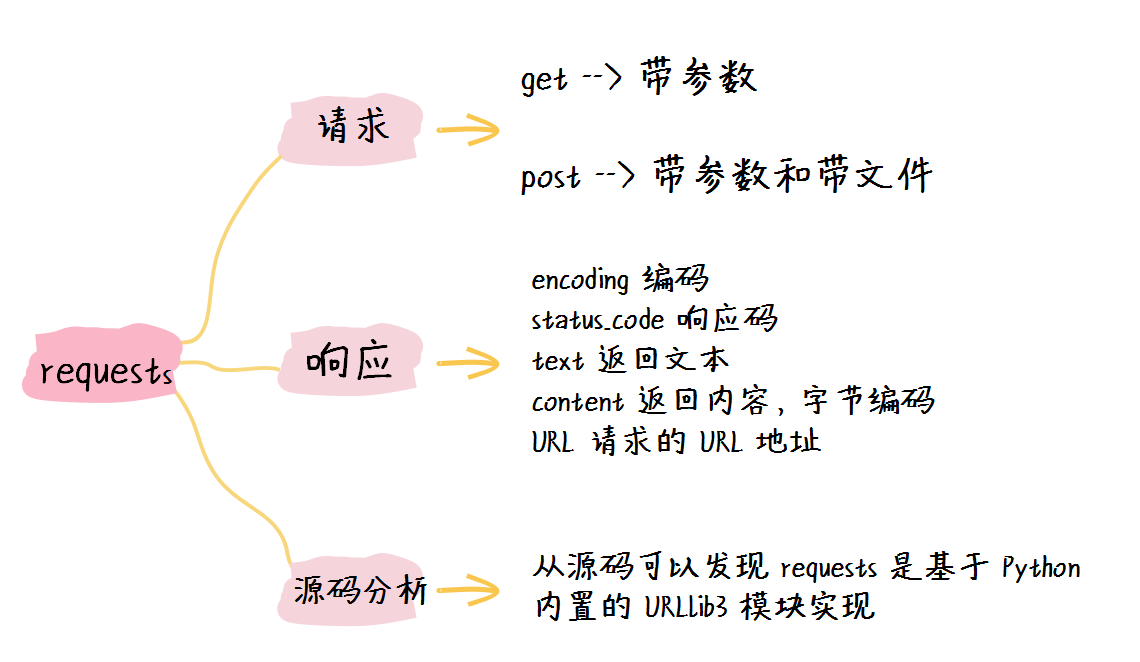
使用 Requests 库请求网址
在 Python 爬虫中,我们使用的最多的就是 requests 库, 截止到 2020年6月,request 库最新的版本为 v2.24.0。来看放放文档介绍:
Requests is an elegant and simple HTTP library for Python, built for human beings.
Requests 是 Python 中的一个简洁优雅的第三方库,且其比较符合人们的使用习惯,这也是大部分人会使用 Requests 来模拟 Http 请求的原因。接下来我们会从使用和源码角度来谈一谈 Requests 库。
1. Requests 库的使用
通常对于 Python 第三方模块的学习方式都是一样的。第一步都是先安装,然后是不断的使用和参考官方文档,待熟练掌握后便可以翻看其源码深入学习其实现原理,最后达到彻底掌握该模块的地步。
[store@server2 chap02]$ pip3 install requests -i http://pypi.douban.com/simple/
接下来我们参考官方文档的第一个实例进行测试,该实例主要是测试 requests 库的一些方法及其使用场景,后面我们会使用 requests 库对网页的数据进行手工爬取以比较和框架爬虫之间的区别。后续都将会在 CentOS7.8 和 Python 3 的环境下:
[store@server2 chap02]$ python3
Python 3.6.8 (default, Apr  2 2020, 13:34:55)
[GCC 4.8.5 20150623 (Red Hat 4.8.5-39)] on linux
Type "help", "copyright", "credits" or "license" for more information.
>>> import requests
>>>
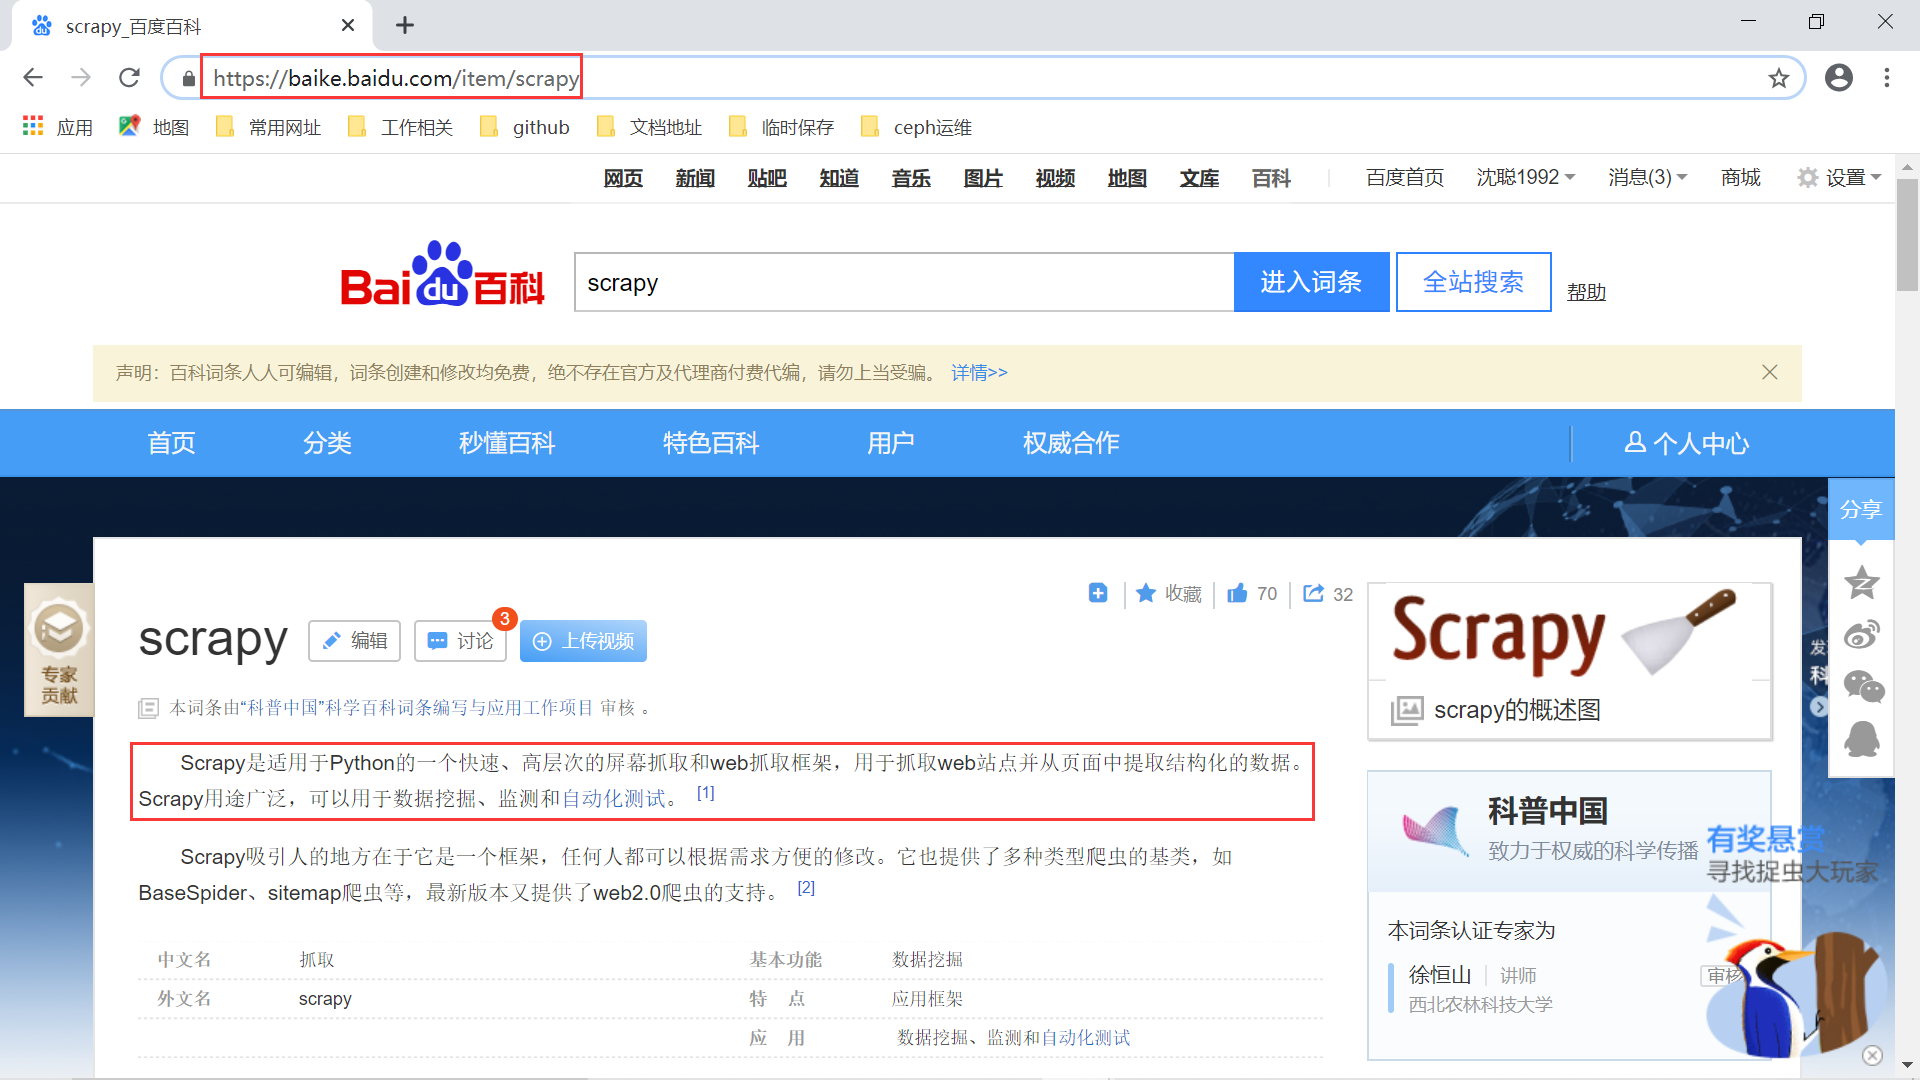
Scrapy 百度百科
接下来我们使用 requests 模块的 get() 方法模拟 http 的 get 请求,获取这样的页面结果:
>>> headers = {'User-Agent': 'Mozilla/5.0 (Windows NT 10.0; Win64; x64) AppleWebKit/537.36 (KHTML, like Gecko) Chrome/83.0.4103.97 Safari/537.36'}
>>> r1 = requests.get(url='https://baike.baidu.com/item/scrapy', headers=headers)
>>> r1.status_code
200
>>> r1.text[:1000]
'<!DOCTYPE html>\n<!--STATUS OK-->\n<html>\n\n\n\n<head>\n<meta charset="UTF-8">\n<meta http-equiv="X-UA-Compatible" content="IE=Edge" />\n<meta name="referrer" content="always" />\n<meta name="description" content="Scrapy是适用于Python的一个快速、高层次的屏幕抓取和web抓取框架,用于抓取web站点并从页面中提取结构化的数据。Scrapy用途广泛,可以用于数据挖掘、监测和自动化测试。Scrapy吸引人的地方在于它是一个框架,任何人都可以根据需求方便的修改。它也提供了多种类型爬虫的基类,如BaseSpider、sitemap爬虫等,最新版本又提供了web2.0爬虫的支持。...">\n<title>scrapy_百度百科</title>\n<link rel="shortcut icon" href="/favicon.ico" type="image/x-icon" />\n<link rel="icon" sizes="any" mask href="//www.baidu.com/img/baidu.svg">\n\n<meta name="keywords" content="scrapy scrapy基本功能 scrapyScrapy架构 scrapy如何开始">\n<meta name="image" content="https://bkssl.bdimg.com/cms/static/baike.png">\n<meta name="csrf-token" content="">\n<meta itemprop="dateUpdate" content="2020-03-19 08:23:19" />\n\n<!--[if lte IE 9]>\n<script>\r\n    (function() {\r\n      var e = "abbr,article,aside,audio,canvas,datalist,details,dialog,eventsource,figure,footer,header,hgroup,mark,menu,meter,nav,outpu
注意:这里 headers 非常重要,很多网站第一步会检查 headers,如果请求头中没有 User-Agent 就会直接判定为爬虫并采取相应措施进行限制。如下是没有加上 headers 的请求结果:
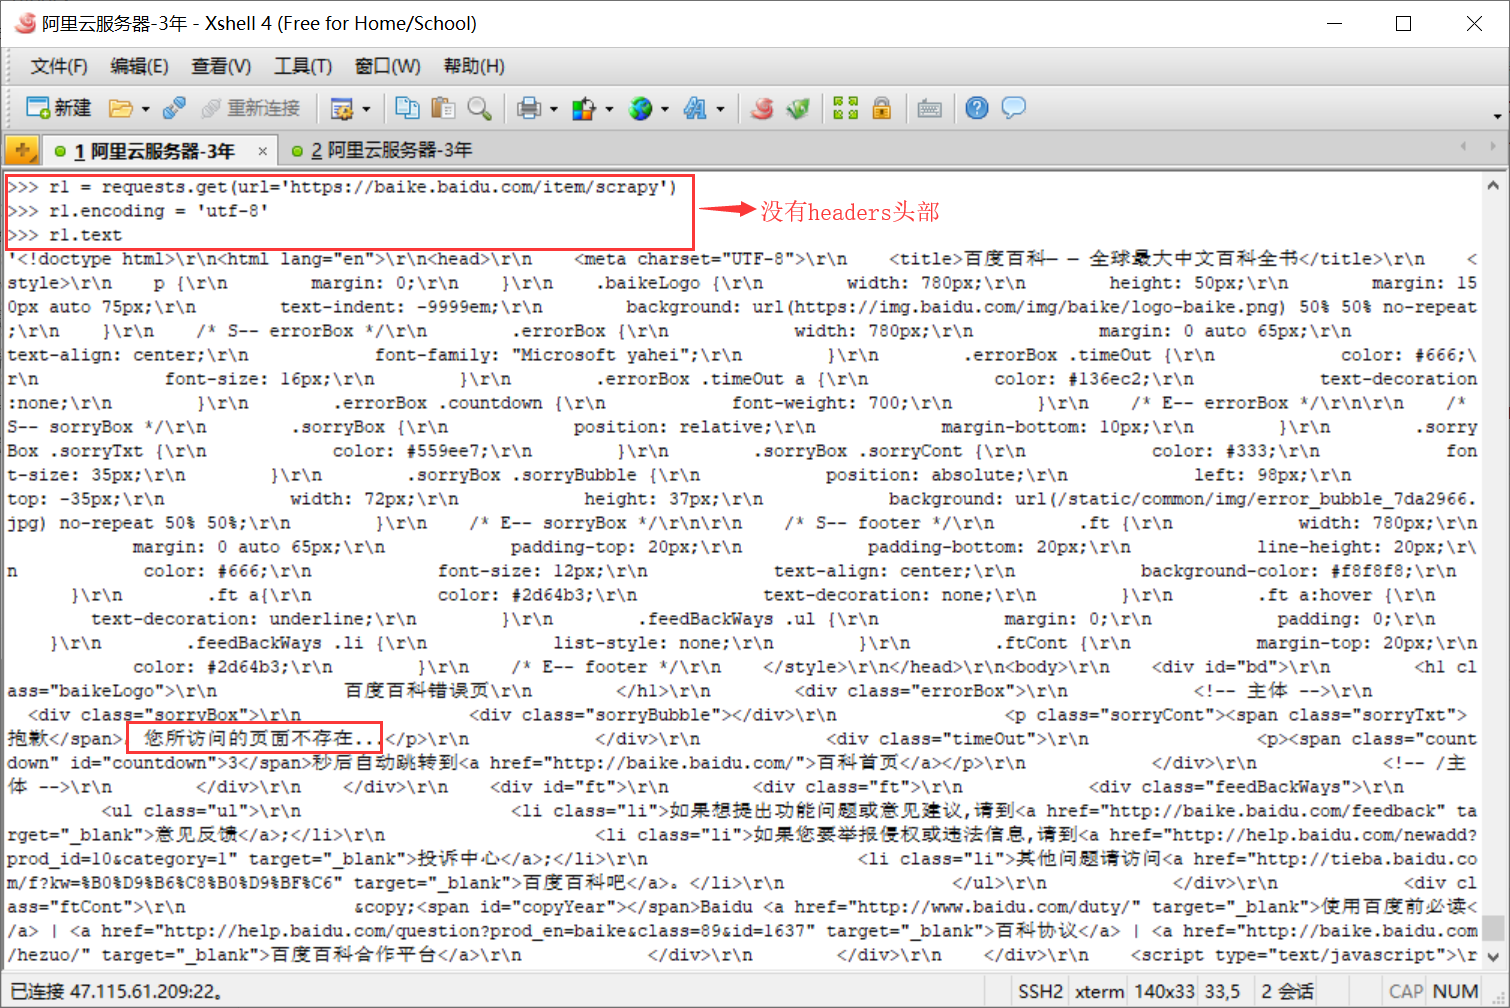
没有 headers 的结果
看到了么,简简单单的 get() 方法就能模拟 HTTP 的 get 请求,那么是不是还有 post()、put()、delete() 这些方法呢?答案是肯定的。
1.1 httpbin
httpbin 这个网站能测试 HTTP 请求和响应的各种信息,比如 cookie、ip、headers 和登录验证等,且支持 get、post、put、delete 等多种方法,对 Web 开发和测试很有帮助。接下来,我们就用 requests 在这个网站上测试下其他的 HTTP 请求:
>>> import requests
>>> r = requests.post('https://httpbin.org/post', data = {'key':'value'})
>>> r.text
'{\n "args": {}, \n "data": "", \n "files": {}, \n "form": {\n "key": "value"\n }, \n "headers": {\n "Accept": "\*/\*", \n "Accept-Encoding": "gzip, deflate", \n "Content-Length": "9", \n "Content-Type": "application/x-www-form-urlencoded", \n "Host": "httpbin.org", \n "User-Agent": "python-requests/2.24.0", \n "X-Amzn-Trace-Id": "Root=1-5ef4800b-da26cce71993bd5eb803d7c9"\n }, \n "json": null, \n "origin": "47.115.61.209", \n "url": "https://httpbin.org/post"\n}\n'
>>> r.json()
{'args': {'key1': 'value1', 'key2': ['value2', 'value3']}, 'headers': {'Accept': '\*/\*', 'Accept-Encoding': 'gzip, deflate', 'Host': 'httpbin.org', 'User-Agent': 'python-requests/2.24.0', 'X-Amzn-Trace-Id': 'Root=1-5ef48767-49d16380b92523febb87f110'}, 'origin': '47.115.61.209', 'url': 'https://httpbin.org/get?key1=value1&key2=value2&key2=value3'}
>>>
在上面的示例代码中,我们使用 requests 库模拟发送了一个 post 请求,且带上了一个参数: key=value。可以看到网站返回的结果是 json 形式的数据,包括了我们发生的数据、请求的头部、来源地址等。
1.2 带参数的 get 请求
我们再来看看 get 请求带参数的方式,示例代码如下:
>>> payload = {'key1': 'value1', 'key2': 'value2'}
>>> r = requests.get('https://httpbin.org/get', params=payload)
>>> r.url
'https://httpbin.org/get?key1=value1&key2=value2'
可以看到 get 请求所携带的参数就是在 url 后使用 ? 将参数的 key 和 value 组合起来,形成完整的请求 url。下面是 get 请求带参数的另一个例子,这里参数 key2 的值是一个列表。
>>> payload = {'key1': 'value1', 'key2': ['value2', 'value3']}
>>> r = requests.get('https://httpbin.org/get', params=payload)
>>> r.url
'https://httpbin.org/get?key1=value1&key2=value2&key2=value3'
来看看 request 库请求的结果:
>>> type(r)
<class 'requests.models.Response'>
>>> dir(r)
['\_\_attrs\_\_', '\_\_bool\_\_', '\_\_class\_\_', '\_\_delattr\_\_', '\_\_dict\_\_', '\_\_dir\_\_', '\_\_doc\_\_', '\_\_enter\_\_', '\_\_eq\_\_', '\_\_exit\_\_', '\_\_format\_\_', '\_\_ge\_\_', '\_\_getattribute\_\_', '\_\_getstate\_\_', '\_\_gt\_\_', '\_\_hash\_\_', '\_\_init\_\_', '\_\_init\_subclass\_\_', '\_\_iter\_\_', '\_\_le\_\_', '\_\_lt\_\_', '\_\_module\_\_', '\_\_ne\_\_', '\_\_new\_\_', '\_\_nonzero\_\_', '\_\_reduce\_\_', '\_\_reduce\_ex\_\_', '\_\_repr\_\_', '\_\_setattr\_\_', '\_\_setstate\_\_', '\_\_sizeof\_\_', '\_\_str\_\_', '\_\_subclasshook\_\_', '\_\_weakref\_\_', '\_content', '\_content\_consumed', '\_next', 'apparent\_encoding', 'close', 'connection', 'content', 'cookies', 'elapsed', 'encoding', 'headers', 'history', 'is\_permanent\_redirect', 'is\_redirect', 'iter\_content', 'iter\_lines', 'json', 'links', 'next', 'ok', 'raise\_for\_status', 'raw', 'reason', 'request', 'status\_code', 'text', 'url']
这里用的最多的有5个,分别为 enconding、status_code、text、content 和 url,它们的含义如下:
- encoding:当读取 r.text 时会使用该值进行编解码;
- status_code:请求返回状态码,200 表示正常;
- text:返回请求的内容,使用 unicode 编码;
- content:返回请求的内容,字节编码;
- url:最终请求的 url。
此外,对于所有的请求,可以带上 headers 参数,这样可以模拟成浏览器的行为。通常不带 headers 很容易就被识别为爬虫程序,通过百度网站的 get 请求就可以看到。带上正常的 header 和 不带或者带上错误的 header 得到的结果不一样:
>>> url = 'https://www.baidu.com'
>>> headers = {'User-Agent': 'Mozilla/5.0 (Windows NT 10.0; Win64; x64) AppleWebKit/537.36 (KHTML, like Gecko) Chrome/83.0.4103.97 Safari/537.36'}
>>> r = requests.get(url, headers=headers)
>>> r.text[:1000]
'<!DOCTYPE html><!--STATUS OK-->\n\n\n    <html><head><meta http-equiv="Content-Type" content="text/html;charset=utf-8"><meta http-equiv="X-UA-Compatible" content="IE=edge,chrome=1"><meta content="always" name="referrer"><meta name="theme-color" content="#2932e1"><meta name="description" content="全球最大的中文搜索引擎、致力于让网民更便捷地获取信息,找到所求。百度超过千亿的中文网页数据库,可以瞬间找到相关的搜索结果。"><link rel="shortcut icon" href="/favicon.ico" type="image/x-icon" /><link rel="search" type="application/opensearchdescription+xml" href="/content-search.xml" title="百度搜索" /><link rel="icon" sizes="any" mask href="//www.baidu.com/img/baidu\_85beaf5496f291521eb75ba38eacbd87.svg"><link rel="dns-prefetch" href="//dss0.bdstatic.com"/><link rel="dns-prefetch" href="//dss1.bdstatic.com"/><link rel="dns-prefetch" href="//ss1.bdstatic.com"/><link rel="dns-prefetch" href="//sp0.baidu.com"/><link rel="dns-prefetch" href="//sp1.baidu.com"/><link rel="dns-prefetch" href="//sp2.baidu.com"/><title>百度一下,你就知道</title><style index="newi" type="text/css">

>>> headers = {'user-agent': 'my-app/0.0.1'}
>>> r = requests.get(url, headers=headers)
>>> r.text
'<html>\r\n<head>\r\n\t<script>\r\n\t\tlocation.replace(location.href.replace("https://","http://"));\r\n\t</script>\r\n</head>\r\n<body>\r\n\t<noscript><meta http-equiv="refresh" content="0;url=http://www.baidu.com/"></noscript>\r\n</body>\r\n</html>'
前面我们也介绍过 requests 库的 post 请求,其参数通过 data 进行传递,下面继续看几个示例:
>>> payload_tuples = [('key1', 'value1'), ('key1', 'value2')]
>>> r1 = requests.post('https://httpbin.org/post', data=payload_tuples)
>>> payload_dict = {'key1': ['value1', 'value2']}
>>> r2 = requests.post('https://httpbin.org/post', data=payload_dict)
>>> print(r1.text)
{
  "args": {},
  "data": "",
  "files": {},
  "form": {
    "key1": [
      "value1",
      "value2"
    ]
  },
  "headers": {
    "Accept": "\*/\*",
    "Accept-Encoding": "gzip, deflate",
    "Content-Length": "23",
    "Content-Type": "application/x-www-form-urlencoded",
    "Host": "httpbin.org",
    "User-Agent": "python-requests/2.24.0",
    "X-Amzn-Trace-Id": "Root=1-5ef49697-c3f6e2a809e33d4895ee6938"
  },
  "json": null,
  "origin": "47.115.61.209",
  "url": "https://httpbin.org/post"
}
上传文件
最后看一看 requests 库中如何上传文件:
>>> url = 'https://httpbin.org/post'
>>> files = {'file': open('/home/store/shen/start.sh', 'rb')}
>>> r = requests.post(url, files=files)
>>> r.text
'{\n  "args": {}, \n  "data": "", \n  "files": {\n    "file": "#!/bin/bash\\n########################################################\\n# author: spyinx (https://blog.csdn.net/qq\_40085317) #\\n# email: 2894577759@qq.com #\\n# date: 2020/6/24 #\\n# function: start agent server on CentOS 7.7 #\\n########################################################\\nAGENT\_PORT=8765\\n\\n# check the agent process first\\nmain\_pid=$(pstree -ap|grep gunicorn|grep -v grep|awk \'NR==1{print}\'|grep -o \\"[0-9]\*\\"|awk \'NR==1{print}\')\\nif [ -n \\"$main_pid\\" ]; then\\n echo \\"get the agent server\'s main pid: $main_pid\\"\\n sudo kill -9 $main\_pid\\n echo \\"stop the server first\\"\\n sleep 15\\n process\_num=$(ps -ef|grep gunicorn|grep -v grep|wc -l)\\n if [ $process\_num -ne 0 ]; then\\n echo \\"close agent server failed\\uff0cexit!\\"\\n exit 1\\n fi\\nfi\\n\\n# start agent server\\nmaster\_addr=$(cat /etc/hosts | grep `hostname` | awk \'{print $1}\')\\necho \\"start agent server\\"\\ngunicorn -w 4 -b $master\_addr:$AGENT\_PORT xstore\_agent.agent:app --daemon\\nsleep 5\\nprocess\_num=$(ps -ef|grep gunicorn|grep -v grep|wc -l)\\nif [ $process\_num -eq 0 ]; then\\n echo \\"start agent server failed\\uff0cplease check it!\\"\\n exit 2\\nfi\\necho \\"start agent server success\\uff0cok!\\""\n  }, \n  "form": {}, \n  "headers": {\n    "Accept": "\*/\*", \n    "Accept-Encoding": "gzip, deflate", \n    "Content-Length": "1356", \n    "Content-Type": "multipart/form-data; boundary=565e2040b1d37bad527477863e64ba6c", \n    "Host": "httpbin.org", \n    "User-Agent": "python-requests/2.24.0", \n    "X-Amzn-Trace-Id": "Root=1-5ef49e5f-a02b3e64f58fe4a3ff51fa94"\n  }, \n  "json": null, \n  "origin": "47.115.61.209", \n  "url": "https://httpbin.org/post"\n}\n'
>>>
在 requests 库中,只需要将上传文件参数传递给 post() 方法即可,是不是非常简单?另外,我们还可以在请求中添加 cookie 或者在相应中获取相应的 cookie 信息。
另外,我们还可以使用 requests 的 Session 来维持会话,这在有登录需求的网站获取数据时会非常有用:
# 创建一个session对象,用来存储session信息
>>> s = requests.session()
>>> s.get("http://www.baidu.com")
如果在登录之后,继续使用 session 对象再请求该网站的其他页面的 url,就会带着 session 信息去与该网站进行交互,模拟登录后的访问。
2. Requests 库源码分析
熟悉了上面的基本操作之后,我带领大家简单看看 requests 库的源码。首先我们带着问题去看源码:
为什么对返回的结果直接使用 json() 方法就能将相应内容转换成 json 格式,它和下面的实现有无区别?
>>> r = requests.post('https://httpbin.org/post', data = {'key':'value'})
>>> import json
>>> json.loads(r.text)
requests.get() 背后的实现过程究竟是怎样的呢?
2.1 json() 方法
带着这两个问题我们来看看 requests 库的源码,可以看到 requests 模块的源码非常少,比较适合阅读。首先看第一个问题,就是要分析下 Response 结果的 json() 方法即可,比较容易找到:
# 源码位置:requests/models.py
# ...

class Response(object):
    # ...

    def json(self, \*\*kwargs):
        r"""Returns the json-encoded content of a response, if any.

 :param \\*\\*kwargs: Optional arguments that ``json.loads`` takes.
 :raises ValueError: If the response body does not contain valid json.
 """

        if not self.encoding and self.content and len(self.content) > 3:
            # No encoding set. JSON RFC 4627 section 3 states we should expect
            # UTF-8, -16 or -32. Detect which one to use; If the detection or
            # decoding fails, fall back to `self.text` (using chardet to make
            # a best guess).
            encoding = guess_json_utf(self.content)
            if encoding is not None:
                try:
                    return complexjson.loads(
                        self.content.decode(encoding), \*\*kwargs
                    )
                except UnicodeDecodeError:
                    # Wrong UTF codec detected; usually because it's not UTF-8
                    # but some other 8-bit codec. This is an RFC violation,
                    # and the server didn't bother to tell us what codec \*was\*
                    # used.
                    pass
        return complexjson.loads(self.text, \*\*kwargs)

    # ...
上面的 json() 方法中最核心的只有一句:
complexjson.loads(self.content.decode(encoding), \*\*kwargs)
而这句和我们前面的得到响应内容,然后使用 json.loads() 是一样的,不过这里使用的是 complexjson。继续看看这个 complexjson 的定义:
# 源码位置:requests/models.py
from .compat import json as complexjson

# 源码位置:requests/compact.py
try:
    import simplejson as json
except ImportError:
    import json
可以看到,这个 complexjson 其实就是 Python 的第三方 json 模块或者是 Python 的内置 json 模块。因此,对于第一个问题就是显而易见了,使用 r.json() 和我们用 json.loads(r.text) 得到的结果基本是一致的。
2.2 get() 方法
接下来我们要追踪一下 requests.get() 请求的完整过程。首先是找到相应的 get() 方法:
# 源码位置: requests/api.py

from . import sessions


def request(method, url, \*\*kwargs):
    with sessions.Session() as session:
        return session.request(method=method, url=url, \*\*kwargs)

def get(url, params=None, \*\*kwargs):
    kwargs.setdefault('allow\_redirects', True)
    return request('get', url, params=params, \*\*kwargs)


def options(url, \*\*kwargs):
    kwargs.setdefault('allow\_redirects', True)
    return request('options', url, \*\*kwargs)


def head(url, \*\*kwargs):
    kwargs.setdefault('allow\_redirects', False)
    return request('head', url, \*\*kwargs)


def post(url, data=None, json=None, \*\*kwargs):
    return request('post', url, data=data, json=json, \*\*kwargs)


def put(url, data=None, \*\*kwargs):
    return request('put', url, data=data, \*\*kwargs)


def patch(url, data=None, \*\*kwargs):
    return request('patch', url, data=data, \*\*kwargs)


def delete(url, \*\*kwargs):
    return request('delete', url, \*\*kwargs)
可以看到,所有的请求最后都是调用同一个 session.request() 方法,我们继续追进去:
# 源码位置:requests/sessions.py

# ...

class Session(SessionRedirectMixin):
    # ...

    # 有了这两个方法就可以使用 with 语句了:
    # with Session() as session:
    # pass
    def \_\_enter\_\_(self):
        return self

    def \_\_exit\_\_(self, \*args):
        self.close()

    # ...

    def request(self, method, url,
            params=None, data=None, headers=None, cookies=None, files=None,
            auth=None, timeout=None, allow_redirects=True, proxies=None,
            hooks=None, stream=None, verify=None, cert=None, json=None):
        # Create the Request.
        req = Request(
            method=method.upper(),
            url=url,
            headers=headers,
            files=files,
            data=data or {},
            json=json,
            params=params or {},
            auth=auth,
            cookies=cookies,
            hooks=hooks,
        )
        prep = self.prepare_request(req)

        proxies = proxies or {}

        settings = self.merge_environment_settings(
            prep.url, proxies, stream, verify, cert
        )

        # Send the request.
        send_kwargs = {
            'timeout': timeout,
            'allow\_redirects': allow_redirects,
        }
        send_kwargs.update(settings)
        # 核心地方,发送 http 请求
        resp = self.send(prep, \*\*send_kwargs)

        return resp

    # ...
我们不过多陷入细节,这些细节函数由读者自行去跟踪和调试。我们从上面的代码中可以看到核心发送 http 请求的代码如下:
resp = self.send(prep, \*\*send_kwargs)
prep 是一个 PreparedRequest 类实例,它和 Request 类非常像。我们继续追踪这个 send() 方法的源码:
# 源码位置:requests/sessions.py:
# ...

class Session(SessionRedirectMixin):
    # ...

    def send(self, request, \*\*kwargs):
        """Send a given PreparedRequest.

 :rtype: requests.Response
 """
        # Set defaults that the hooks can utilize to ensure they always have
        # the correct parameters to reproduce the previous request.
        kwargs.setdefault('stream', self.stream)
        kwargs.setdefault('verify', self.verify)
        kwargs.setdefault('cert', self.cert)
        kwargs.setdefault('proxies', self.proxies)

        # It's possible that users might accidentally send a Request object.
        # Guard against that specific failure case.
        if isinstance(request, Request):
            raise ValueError('You can only send PreparedRequests.')

        # Set up variables needed for resolve\_redirects and dispatching of hooks
        allow_redirects = kwargs.pop('allow\_redirects', True)
        stream = kwargs.get('stream')
        hooks = request.hooks

        # Get the appropriate adapter to use
        adapter = self.get_adapter(url=request.url)

        # Start time (approximately) of the request
        start = preferred_clock()

        # Send the request
        r = adapter.send(request, \*\*kwargs)

        # Total elapsed time of the request (approximately)
        elapsed = preferred_clock() - start
        r.elapsed = timedelta(seconds=elapsed)

        # Response manipulation hooks
        r = dispatch_hook('response', hooks, r, \*\*kwargs)

        # Persist cookies
        if r.history:

            # If the hooks create history then we want those cookies too
            for resp in r.history:
                extract_cookies_to_jar(self.cookies, resp.request, resp.raw)

        extract_cookies_to_jar(self.cookies, request, r.raw)

        # Resolve redirects if allowed.
        if allow_redirects:
            # Redirect resolving generator.
            gen = self.resolve_redirects(r, request, \*\*kwargs)
            history = [resp for resp in gen]
        else:
            history = []

        # Shuffle things around if there's history.
        if history:
            # Insert the first (original) request at the start
            history.insert(0, r)
            # Get the last request made
            r = history.pop()
            r.history = history

        # If redirects aren't being followed, store the response on the Request for Response.next().
        if not allow_redirects:
            try:
                r._next = next(self.resolve_redirects(r, request, yield_requests=True, \*\*kwargs))
            except StopIteration:
                pass

        if not stream:
            r.content

        return r
代码会有点长,大家需要自行看看这个方法的逻辑,不要陷入细节。从上面的代码我们可以发现两个关键语句:
adapter = self.get_adapter(url=request.url):获取合适的请求适配器;r = adapter.send(request, **kwargs):发送请求,获取响应结果;
第一个 adapter 怎么来的呢?继续看那个 self.get_adapter() 方法:
# 源码位置:requests/sessions.py:
# ...

class Session(SessionRedirectMixin):
    # ...

    def \_\_init\_\_(self):
        # ...

        # Default connection adapters.
        self.adapters = OrderedDict()
        self.mount('https://', HTTPAdapter())
        self.mount('http://', HTTPAdapter())

    # ...

    def get\_adapter(self, url):
        """
 Returns the appropriate connection adapter for the given URL.

 :rtype: requests.adapters.BaseAdapter
 """
        for (prefix, adapter) in self.adapters.items():

            if url.lower().startswith(prefix.lower()):
                return adapter

        # Nothing matches :-/
        raise InvalidSchema("No connection adapters were found for {!r}".format(url))

    # ...
其实仔细在分析下,就可以知道我们在初始化 (__init__.py) 中添加了请求前缀 prefix (https:// 和 http://) 对应的连接适配器 (HTTPAdapter()),因此这里 adapter 对应的就是 HTTPAdapter 类实例。此时要找发送 http 请求的 send() 方法就需要去 `HTTPAdapter 中查找:
# 源码位置:requests/adapters.py
# ...
class BaseAdapter(object):
    """The Base Transport Adapter"""

    def \_\_init\_\_(self):
        super(BaseAdapter, self).__init__()

    def send(self, request, stream=False, timeout=None, verify=True,
             cert=None, proxies=None):
        raise NotImplementedError

    def close(self):
        """Cleans up adapter specific items."""
        raise NotImplementedError

class HTTPAdapter(BaseAdapter):
    # ...

    def send(self, request, stream=False, timeout=None, verify=True, cert=None, proxies=None):
        try:
            conn = self.get_connection(request.url, proxies)
            # 自行加上一个打印语句,查看conn类型
            # print('conn:', type(conn))
        except LocationValueError as e:
            raise InvalidURL(e, request=request)

        self.cert_verify(conn, request.url, verify, cert)
        url = self.request_url(request, proxies)
        self.add_headers(request, stream=stream, timeout=timeout, verify=verify, cert=cert, proxies=proxies)

        chunked = not (request.body is None or 'Content-Length' in request.headers)

        # ...
        try:
            if not chunked:
                resp = conn.urlopen(
                    method=request.method,
                    url=url,
                    body=request.body,
                    headers=request.headers,
                    redirect=False,
                    assert_same_host=False,
                    preload_content=False,
                    decode_content=False,
                    retries=self.max_retries,
                    timeout=timeout
                )

            # Send the request.
            else:
                # ...

        except (ProtocolError, socket.error) as err:
            raise ConnectionError(err, request=request)

        except MaxRetryError as e:
            # ...

        except ClosedPoolError as e:
            raise ConnectionError(e, request=request)

        except _ProxyError as e:
            raise ProxyError(e)

        except (_SSLError, _HTTPError) as e:
            # ...

        return self.build_response(request, resp)
就我们前面的请求而言,request.body 往往为 None,所以 chunked 一般为 False。那么最终的请求走的就是conn.urlopen() 方法。
注意:这里最关键的步骤是得到连接远端服务的信息 conn,后面发送数据都是通过 conn 走的。
# 源码位置:requests/adapters.py
# ...
class BaseAdapter(object):
    """The Base Transport Adapter"""

    def get\_connection(self, url, proxies=None):
        """Returns a urllib3 connection for the given URL. This should not be
 called from user code, and is only exposed for use when subclassing the
 :class:`HTTPAdapter <requests.adapters.HTTPAdapter>`.

 :param url: The URL to connect to.
 :param proxies: (optional) A Requests-style dictionary of proxies used on this request.
 :rtype: urllib3.ConnectionPool
 """
        proxy = select_proxy(url, proxies)

        if proxy:
            # 使用代理
            # ...
        else:
            # Only scheme should be lower case
            parsed = urlparse(url)
            url = parsed.geturl()
            conn = self.poolmanager.connection_from_url(url)

        return conn
我们可以运行并打印这个 conn 变量。这里需要改源代码,在源码位置加上一行 print() 方法:
>>> import requests
>>> payload = {'key1': 'value1', 'key2': ['value2', 'value3']}
>>> r = requests.get('https://httpbin.org/get', params=payload)
conn: <class 'urllib3.connectionpool.HTTPSConnectionPool'>
>>>
我们终于看到,最后 requests 库其实就是封装 Python 内置的 urllib3 模块来完成 http 请求的。上面获取 conn 值的代码比较多且绕,有兴趣的读者可以自行跟踪下,限于篇幅,这里就不过多描述了。
3. 小结
本小节中我们首先从使用 Requests 库入手,介绍了其常用的类和方法;接下来从源码的角度来查看 Requests 库,挖掘一些库背后的实现原理,帮助我们更好的理解 Requests 库。今天的学习到此结束,大家有收获了吗?