深入理解 Scrapy 的 Pipeline
今天我们来深入学习 Scrapy 框架 Pipeline 的工作原理。这一次我们采取一种新的学习方式:先提出疑问,然后从源码中进行解答,直到最后我们彻底搞清楚 Pipeline 的工作流程。
1. 问题描述
这一小节我们将从源码的角度来分析 Pipeline 的工作过程。现在我先提出几个疑问:
- Scrapy 框架中使用 Pipeline 处理 Item 的代码在哪里?为什么我在 settings.py 中设置了 ITEM_PIPELINES 属性值,Scrapy 就能将其作为 Pipeline 去处理对应 Spider 生成的 Item 呢?
- 定义 Pipeline 的那四个方法来自哪里?为什么一定需要 process_item() 方法?
- 第12节中抓取起点月票榜小说时用到了图片管道,该管道的一个详细的处理流程是怎样的,即它如何实现图片下载?
带着这些疑问,我们来进入源码中寻找答案。
2. 源码解惑
2.1 Item Pipeline 的管理器类
还记得上一小节我们追踪 Spider 中间件的代码时,在 scrapy/core/scraper.py 中找到了 Spider 中间件处理 Spider 模块返回结果的方法,其代码内容如下:
# 源码位置:scrapy/core/scraper.py
# ...

class Scraper:
    # ...

    def \_process\_spidermw\_output(self, output, request, response, spider):
        """Process each Request/Item (given in the output parameter) returned
 from the given spider
 """
        if isinstance(output, Request):
            # 如果spider中间件返回的是Request,则继续调用引擎去处理请求
            self.crawler.engine.crawl(request=output, spider=spider)
        elif is_item(output):
            # 如果spider中间件返回的是item,则调用self.itemproc对象的process\_item()方法处理
            self.slot.itemproc_size += 1
            dfd = self.itemproc.process_item(output, spider)
            dfd.addBoth(self._itemproc_finished, output, response, spider)
            return dfd
        elif output is None:
            pass
        else:
            # 打印错误日志
            # ...
从上面的代码我们知道,对于 Spider 中间件模块最后返回的 Item 类型数据会调用 self.itemproc 对象的 process_item() 方法处理,那么这个 self.itemproc 对象是什么呢?找到 Scraper 类的 __init__() 方法:
# 源码位置:scrapy/core/scraper.py
# ...

class Scraper:

    def \_\_init\_\_(self, crawler):
        # ...
        itemproc_cls = load_object(crawler.settings['ITEM\_PROCESSOR'])
        self.itemproc = itemproc_cls.from_crawler(crawler)
        # ...

    # ...
来看默认的配置中关于 ITEM_PROCESSOR 的值,如下:
# 源码位置: scrapy/settings/default\_settings.py
# ...
ITEM_PROCESSOR = 'scrapy.pipelines.ItemPipelineManager'
# ...
单看这个类的名称,又是一个某某管理器类,前面我们学了下载中间件管理类、Spider 中间件管理类,分别管理下载中间件类以及 Spider 中间件类,维护所属类方法的处理顺序。这里我们也是需要一个同样功能的管理类,来保证依次处理相应的 Item pipelines。我们进入该管理器类,阅读其实现代码:
# 源码位置:scrapy/

from scrapy.middleware import MiddlewareManager
from scrapy.utils.conf import build_component_list
from scrapy.utils.defer import deferred_f_from_coro_f


class ItemPipelineManager(MiddlewareManager):

    component_name = 'item pipeline'

    @classmethod
    def \_get\_mwlist\_from\_settings(cls, settings):
        return build_component_list(settings.getwithbase('ITEM\_PIPELINES'))

    def \_add\_middleware(self, pipe):
        super(ItemPipelineManager, self)._add_middleware(pipe)
        if hasattr(pipe, 'process\_item'):
           self.methods['process\_item'].append(deferred_f_from_coro_f(pipe.process_item))

    def process\_item(self, item, spider):
        return self._process_chain('process\_item', item, spider)
同样,这个管理类直接就继承了前面的中间件管理器类,其代码量非常少,十分容易理解。
首先它和所有的中间件管理类一样从全局配置中获的对应管理的 pipelines,这个配置正是 ITEM_PIPELINES。其次,注意到这个 _add_middleware() 方法中有个调用父类的 _add_middleware() 方法,而父类中该方法的代码如下:
# 源码位置: scrapy/middleware.py
# ...

class MiddlewareManager:
    # ...

    def \_add\_middleware(self, mw):
        if hasattr(mw, 'open\_spider'):
            self.methods['open\_spider'].append(mw.open_spider)
        if hasattr(mw, 'close\_spider'):
            self.methods['close\_spider'].appendleft(mw.close_spider)
我们从而得知,在 pipeline 中会将 open_spider()、close_spider() 以及 process_item() 方法加入到对应的处理链中,且 MiddlewareManager 类中 from_crawler() 是一个类方法,因此对于继承该类的子类也同样会有该方法,也即具备了通过 Crawler 类对象实例化的能力。
2.2 Scrapy 框架内置的 Pipelines 分析
前面第12节中,我们在介绍 Scrapy 框架的管道内容时,使用了其内置的图片处理管道 (ImagesPipeline),它对应的代码位置为:scrapy/pipelines/images.py。接下来,我们将分析其源码,看看如何实现图片下载的功能。
首先看看类继承关系:在 images.py 中定义的 ImagesPipeline 继承了 files.py 中定义的 FilesPipeline 类;而 FilesPipeline 类又继承至 media.py 中定义的 MediaPipeline 类。因此,我们先从分析基类开始,我们从管道的两个核心方法开始入手:
- 初始化方法:
__init__(); - Item 核心处理方法:
process_item();
首先来看初始化的代码,如下:
# 源码位置:scrapy/pipelines/media.py
# ...
class MediaPipeline:

    LOG_FAILED_RESULTS = True

    class SpiderInfo:
        def \_\_init\_\_(self, spider):
            self.spider = spider
            self.downloading = set()
            self.downloaded = {}
            self.waiting = defaultdict(list)

    def \_\_init\_\_(self, download_func=None, settings=None):
        self.download_func = download_func

        if isinstance(settings, dict) or settings is None:
            settings = Settings(settings)
        resolve = functools.partial(self._key_for_pipe,
                                    base_class_name="MediaPipeline",
                                    settings=settings)
        self.allow_redirects = settings.getbool(
            resolve('MEDIA\_ALLOW\_REDIRECTS'), False
        )
        self._handle_statuses(self.allow_redirects)

    def \_handle\_statuses(self, allow_redirects):
        # 默认不允许重定向
        self.handle_httpstatus_list = None
        if allow_redirects:
            # 当设置了allow\_redirects时,会考虑处理存在3xx的下载地址
            self.handle_httpstatus_list = SequenceExclude(range(300, 400))

    def \_key\_for\_pipe(self, key, base_class_name=None, settings=None):
        """
 >>> MediaPipeline().\_key\_for\_pipe("IMAGES")
 'IMAGES'
 >>> class MyPipe(MediaPipeline):
 ... pass
 >>> MyPipe().\_key\_for\_pipe("IMAGES", base\_class\_name="MediaPipeline")
 'MYPIPE\_IMAGES'
 """
        class_name = self.__class__.__name__
        formatted_key = "{}\_{}".format(class_name.upper(), key)
        if (
            not base_class_name
            or class_name == base_class_name
            or settings and not settings.get(formatted_key)
        ):
            return key
        return formatted_key

    # ...
上面的类中又定义了一个类:SpiderInfo ,这个类只是用来保存多个数据用的。此外,初始化方法中主要读取相关的配置,判断是否需要允许下载的 URL 重定向。该参数在 Scrapy 官方文档中的说明如下:
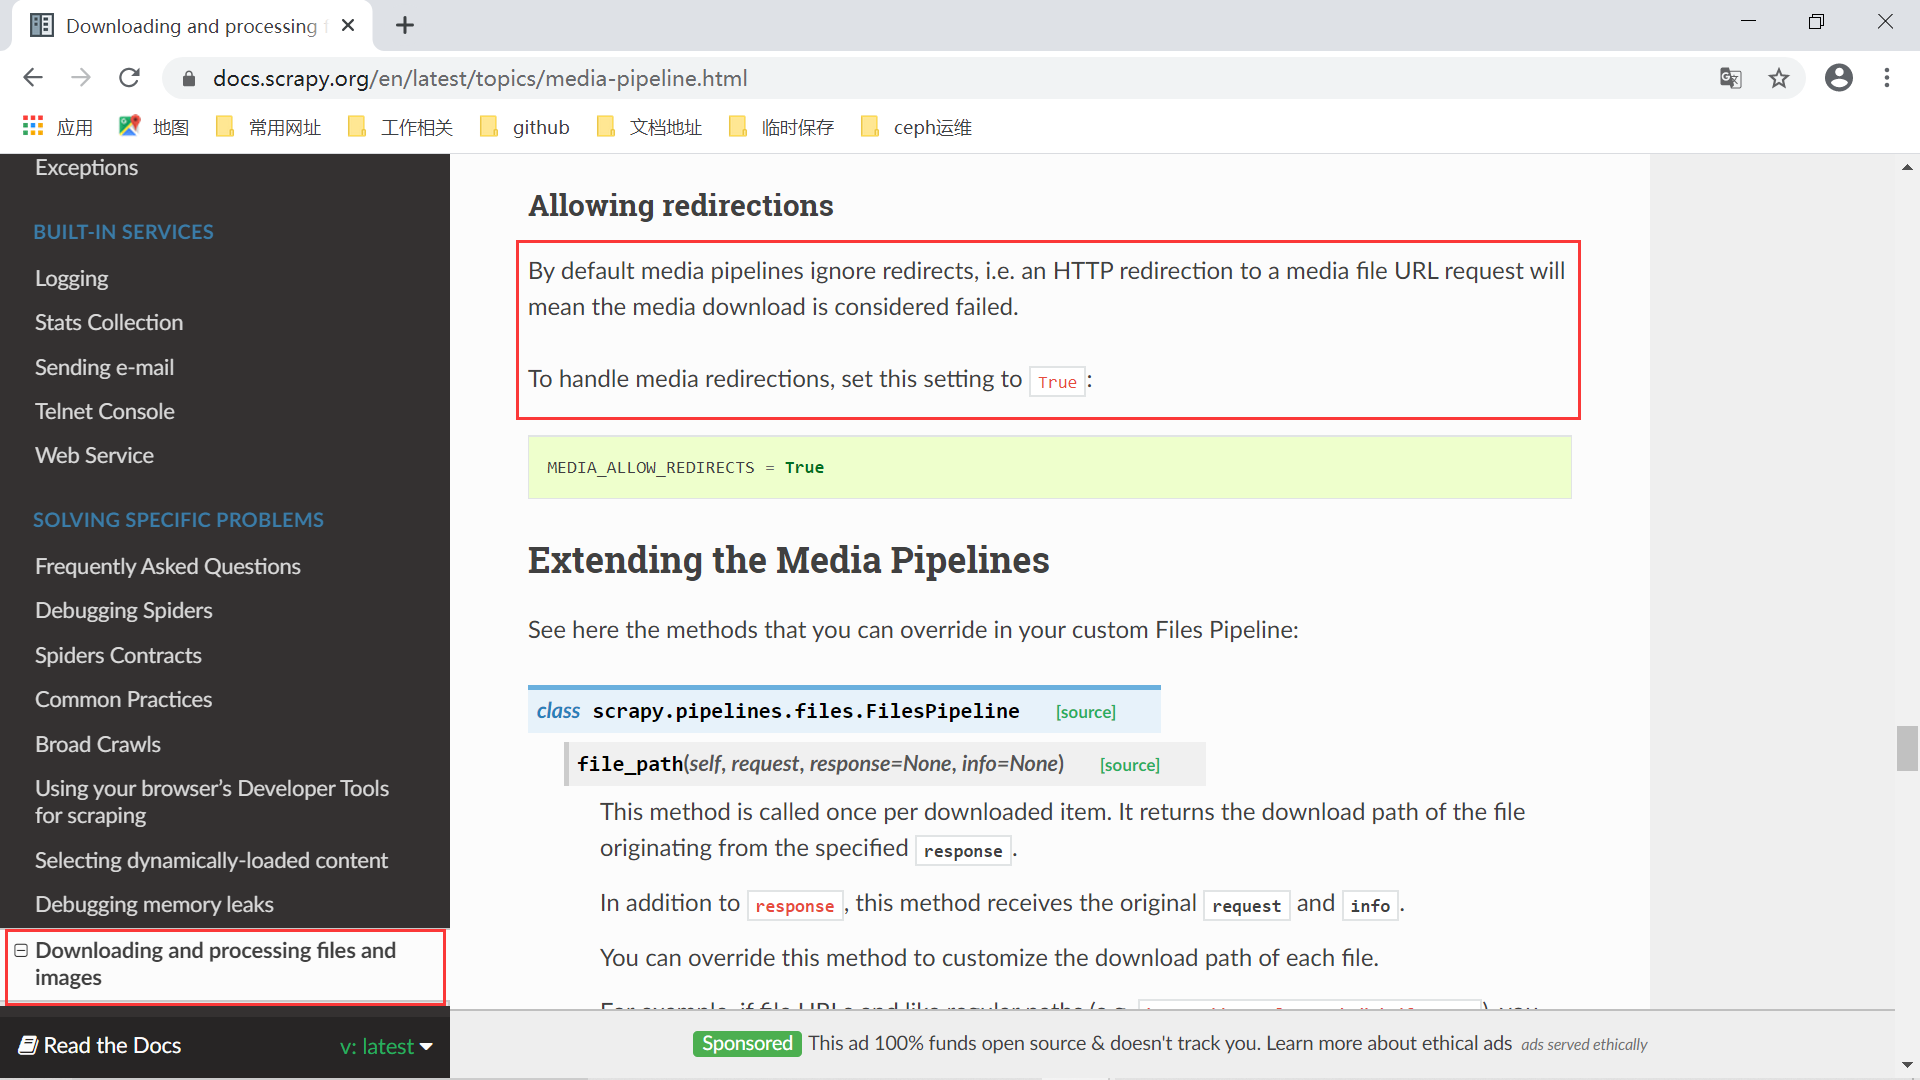
处理管道媒体文件下载地址重定向问题 接下来是核心的处理 Item 的方法:
# 源码位置:scrapy/pipelines/media.py
# ...
class MediaPipeline:
    # ...

    def process\_item(self, item, spider):
        info = self.spiderinfo
        # 从item中获取请求列表
        requests = arg_to_iter(self.get_media_requests(item, info))
        # 形成相关的处理链表
        dlist = [self._process_request(r, info) for r in requests]
        dfd = DeferredList(dlist, consumeErrors=1)
        # 上述的处理全部完成后的回调
        return dfd.addCallback(self.item_completed, item, info)

    # ...
我们知道管道类中处理 Item 的核心方法是 process_item() ,上面的 process_item() 方法先调用对象的 get_media_requests() 方法从输入的 item 中获取相应的请求列表,然后在形成对应的请求列表,处理请求的方法为:_process_request(),最后所有的请求完成后会执行对象的 item_completed() 方法。
# 源码位置:scrapy/pipelines/media.py
# ...

class MediaPipeline:
    # ...

    def get\_media\_requests(self, item, info):
        """Returns the media requests to download"""
        pass

    # ...
这个 get_media_requests() 需要在后续的继承类中实现。接下来看处理下载请求的方法:
# 源码位置:scrapy/pipelines/media.py
# ...

class MediaPipeline:
    # ...

    def \_process\_request(self, request, info):
        # 每个请求计算一个指纹,以保证后面不重复请求
        fp = request_fingerprint(request)
        # 请求回调
        cb = request.callback or (lambda _: _)
        # 请求错误回调
        eb = request.errback
        request.callback = None
        request.errback = None

        # 如果已经请求过了,直接取缓存的结果
        if fp in info.downloaded:
            return defer_result(info.downloaded[fp]).addCallbacks(cb, eb)

        # Otherwise, wait for result
        wad = Deferred().addCallbacks(cb, eb)
        # 将请求的回调链加入对应的请求key中
        info.waiting[fp].append(wad)

        # 检查请求是否正在下载中,避免二次请求
        if fp in info.downloading:
            return wad

        # 将请求加入正在下载的队列
        info.downloading.add(fp)
        # 创建Deferred对象,对应方法为self.media\_to\_download()
        dfd = mustbe_deferred(self.media_to_download, request, info)
        # 在self.media\_to\_download()方法处理完后回调self.\_check\_media\_to\_download()方法
        dfd.addCallback(self._check_media_to_download, request, info)
        # 此外,再加入统一回调方法
        dfd.addBoth(self._cache_result_and_execute_waiters, fp, info)
        dfd.addErrback(lambda f: logger.error(
            f.value, exc_info=failure_to_exc_info(f), extra={'spider': info.spider})
        )
        return dfd.addBoth(lambda _: wad)  # it must return wad at last

    # ...
上面请求的过程在注释中已详细说明,这里处理下载请求主要涉及的方法为:self.media_to_download() 以及 self._check_media_to_download()。我们继续查看该方法的代码:
# 源码位置:scrapy/pipelines/media.py
# ...

class MediaPipeline:
    # ...

    # Overridable Interface
    def media\_to\_download(self, request, info):
        """Check request before starting download"""
        pass

    def \_check\_media\_to\_download(self, result, request, info):
        if result is not None:
            return result
        if self.download_func:
            # this ugly code was left only to support tests. TODO: remove
            dfd = mustbe_deferred(self.download_func, request, info.spider)
            dfd.addCallbacks(
                callback=self.media_downloaded, callbackArgs=(request, info),
                errback=self.media_failed, errbackArgs=(request, info))
        else:
            self._modify_media_request(request)
            # 将请求发给引擎模块,调用download()方法下载网页
            dfd = self.crawler.engine.download(request, info.spider)
            dfd.addCallbacks(
                callback=self.media_downloaded, callbackArgs=(request, info),
                errback=self.media_failed, errbackArgs=(request, info))
        return dfd

    # ...
可以看到 media_to_download() 方法也是在继承类中需要重写的,而 _check_media_to_download() 方法则是核心处理下载文件或者图片的地方。该方法中首先判断是否有传入的 download_func() 方法用于下载网页,如果没有则调用引擎模块中的 download() 方法下载网页数据,成功后调用 media_downloaded() 方法,失败则调用 media_failed() 方法。最后我们来看下 self._cache_result_and_execute_waiters() 方法,其内容和逻辑比较简单,就是缓存请求的数据并将请求清除等待队列:
# 源码位置:scrapy/pipelines/media.py
# ...

class MediaPipeline:
    # ...

    def \_cache\_result\_and\_execute\_waiters(self, result, fp, info):
        if isinstance(result, Failure):
            # minimize cached information for failure
            result.cleanFailure()
            result.frames = []
            result.stack = None
            context = getattr(result.value, '\_\_context\_\_', None)
            if isinstance(context, StopIteration):
                setattr(result.value, '\_\_context\_\_', None)

        # 下载队列中移除该请求
        info.downloading.remove(fp)
        # 缓存下载请求结果
        info.downloaded[fp] = result
        # 移除等待队列中的该请求
        for wad in info.waiting.pop(fp):
            # 将原来请求的回调方法以及错误回调方法,加入回调处理链
            defer_result(result).chainDeferred(wad)
此时,我们总结下 MediaPipeline 类的核心处理流程:
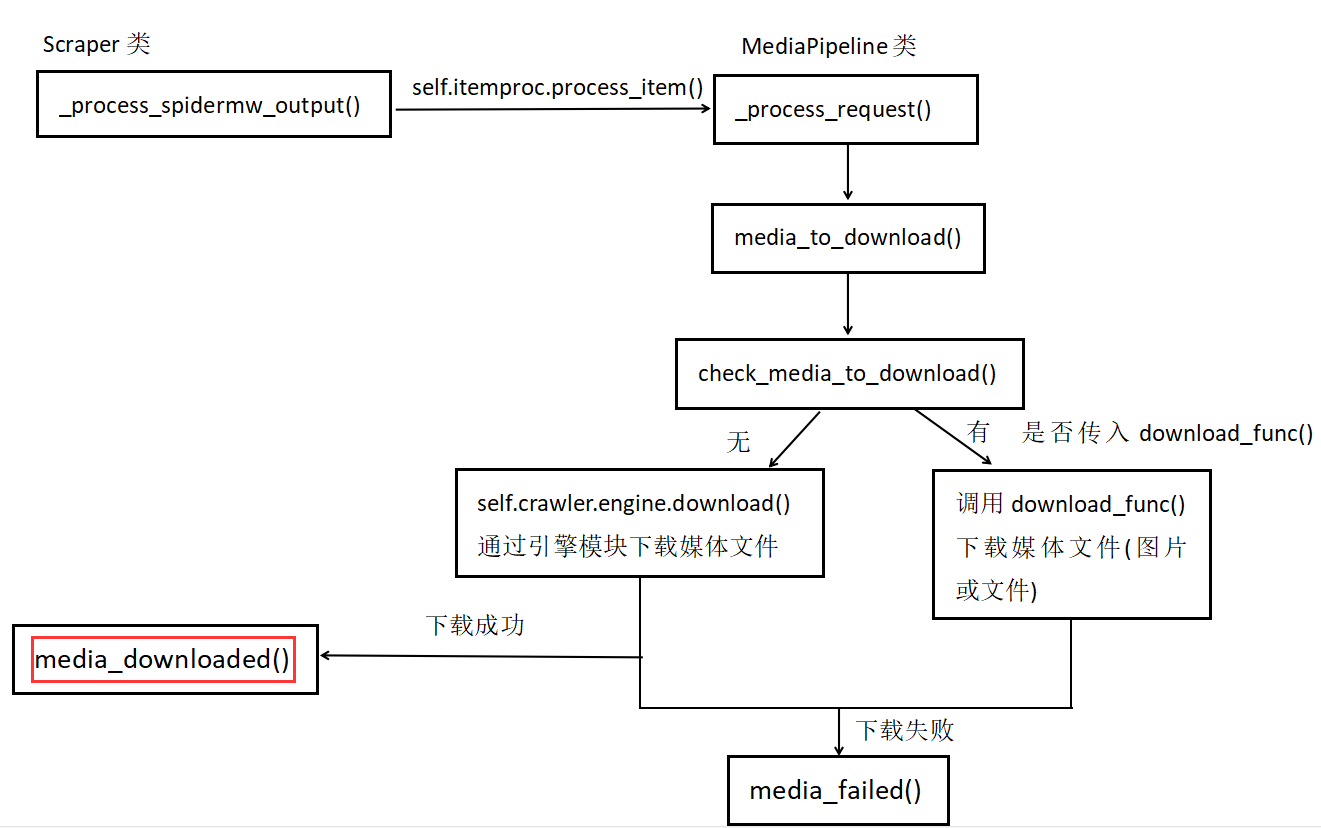
管道下载媒体数据详细流程
到此,MediaPipeline 类的核心方法我们已经研究完毕,接下来开始继续学习 MediaPipeline 这个类。注意到该类中并没有 process_item() 方法,因此它直接继承父类的 process_item() 方法。从 MediaPipeline 类中可知在 _check_media_to_download() 方法中会下载相应的媒体文件,成功后会回调 media_downloaded() 方法
# 源码位置:scrapy/pipelines/files.py
# ...

class FilesPipeline(MediaPipeline):
    # ...

    def media\_downloaded(self, response, request, info):
        referer = referer_str(request)

        if response.status != 200:
            # 打印告警信息,下载失败
            # ...
            raise FileException('download-error')

        if not response.body:
            # 打印告警信息,无下载内容
            # ...
            raise FileException('empty-content')

        status = 'cached' if 'cached' in response.flags else 'downloaded'
        # 打印debug信息
        self.inc_stats(info.spider, status)

        try:
            # 设置下载文件路径
            path = self.file_path(request, response=response, info=info)
            # 将下载的内容保存成本地文件
            checksum = self.file_downloaded(response, request, info)
        except FileException as exc:
            # 打印异常信息
            # ...
            raise
        except Exception as exc:
            # 打印异常信息
            # ...
            raise FileException(str(exc))

        return {'url': request.url, 'path': path, 'checksum': checksum, 'status': status}

    # ...
从上面的代码可知,在请求成功后,下载的内容保存在 response.body 中,上面的代码就是将该文件内容保存成磁盘上的文件:
# 源码位置:scrapy/pipelines/files.py
# ...

class FilesPipeline(MediaPipeline):
    # ...

    def file\_downloaded(self, response, request, info):
        # 生成文件保存路径
        path = self.file_path(request, response=response, info=info)
        # 获取字节流形式的下载内容
        buf = BytesIO(response.body)
        checksum = md5sum(buf)
        buf.seek(0)
        # 持久化保存
        self.store.persist_file(path, buf, info)
        # 返回文件的md5值
        return checksum
上面的代码是不是已经够清楚了?最后文件内容是 buf,保存的方法是 self.store.persist_file(path, buf, info),该方法是支持将下载内容保存成多种形式,比如保存到本地文件中、保存到 FTP 服务器上,甚至可以通过 S3 接口保存到云存储中。来看看保存成本地文件形式的代码,其实和我们平时写的文件操作一样,都是 open() 方法打开文件句柄,然后使用 wb 模式将内容写到文件中。
# 源码位置:scrapy/pipelines/files.py
# ...

class FSFilesStore:
    # ...

    def persist\_file(self, path, buf, info, meta=None, headers=None):
        absolute_path = self._get_filesystem_path(path)
        self._mkdir(os.path.dirname(absolute_path), info)
        # 保存文件
        with open(absolute_path, 'wb') as f:
            f.write(buf.getvalue())

     # ...
最后对于 ImagesPipeline 类,其基本处理流程不变,只不过最后的保存方式和普通文件管道不一样,我们来看下面几个方法:
# 源码位置:scrapy/pipelines/images.py
# ...

class ImagesPipeline(FilesPipeline):
    # ...

    def file\_downloaded(self, response, request, info):
        return self.image_downloaded(response, request, info)

    def image\_downloaded(self, response, request, info):
        checksum = None
        for path, image, buf in self.get_images(response, request, info):
            if checksum is None:
                buf.seek(0)
                checksum = md5sum(buf)
            width, height = image.size
            # 保存成图片形式
            self.store.persist_file(
                path, buf, info,
                meta={'width': width, 'height': height},
                headers={'Content-Type': 'image/jpeg'})
        return checksum

    def get\_images(self, response, request, info):
        path = self.file_path(request, response=response, info=info)
        # 下载的图片内容主体
        orig_image = Image.open(BytesIO(response.body))

        width, height = orig_image.size
        if width < self.min_width or height < self.min_height:
            raise ImageException("Image too small (%dx%d < %dx%d)" %
                                 (width, height, self.min_width, self.min_height))

        image, buf = self.convert_image(orig_image)
        yield path, image, buf

        for thumb_id, size in self.thumbs.items():
            thumb_path = self.thumb_path(request, thumb_id, response=response, info=info)
            thumb_image, thumb_buf = self.convert_image(image, size)
            yield thumb_path, thumb_image, thumb_buf

    def convert\_image(self, image, size=None):
        # 图片转换格式
        # ...

        if size:
            image = image.copy()
            image.thumbnail(size, Image.ANTIALIAS)

        buf = BytesIO()
        image.save(buf, 'JPEG')
        return image, buf
至于上面的代码细节限于篇幅就不再深究了,有兴趣的可以课后去深入学习,这里主要是使用了 Python 的一个专门用来处理图片的第三方模块:PIL。掌握了该模块的基本用法后,再看这些代码就一目了然了,都是非常常规和基础的代码。
好了,本小节的内容就到这里了。如果你能坚持看到这里,在回过头看看前面提出的问题,是否在心里都已经有了准确的答案?所有的疑问其实在看一遍源码之后便会豁然开朗,我们也能理解 Scrapy 中设置的参数的含义以及其作用,这些是我们后续深入定制化 Scrapy 框架的基础,一定要掌握。
3. 小结
本小节中我们先提出了 3 个问题,然后带着问题进入 Scrapy 的源码寻找答案,在最后完整看完 Pipeline 的工作代码后,在回过头来看原来的问题时,答案已经一目了然了。这种学习源码的方式也是非常有效的,带着问题去看代码。此外,我们没有深究代码细节,主要是根据架构图的数据导向来学习源码,课后也希望读者能继续深入这块的代码研究,提出问题,然后解答问题,最后完全掌握该模块。